Published on March 7, 2026
Copper Shower Pan Repair
I performed an emergency repair on a copper shower pan using epoxy resin and woven fiberglass to patch the central drain portion and retrofit a modern drain.
Failure at 95 Years of Service Life
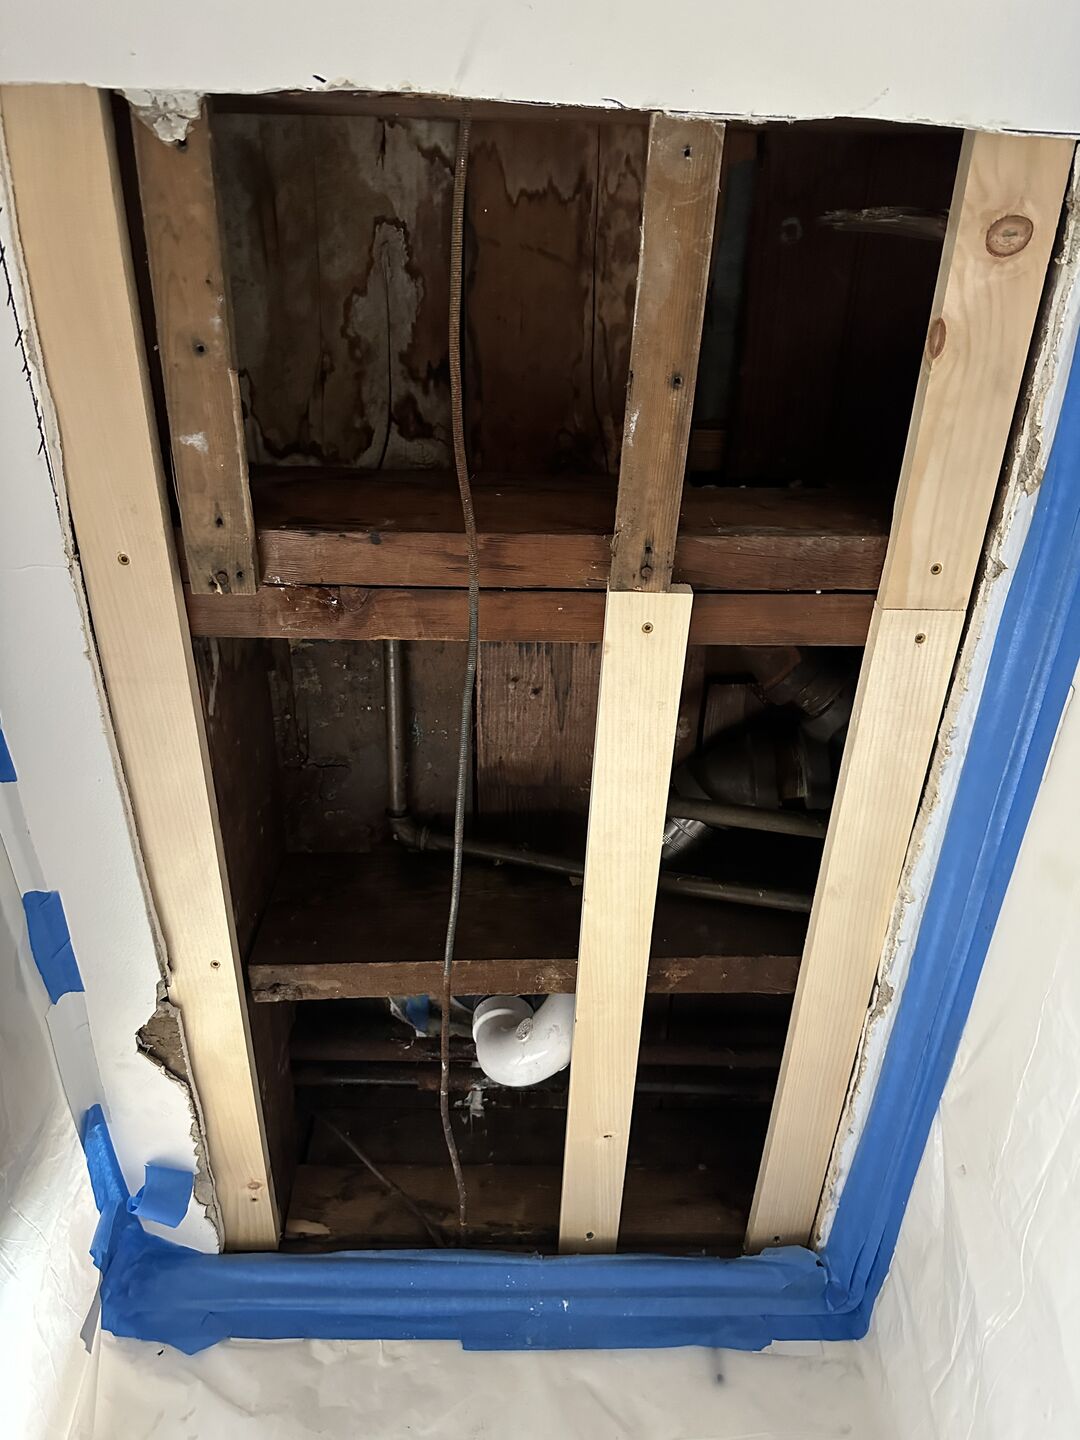
On a second floor bathroom, the shower started leaking, releasing large amounts of water into the room below. Luckily the damage to the building was minimal. Notably, the gypsum lathe and plaster ceiling did not suffer major damage, speaking to the quality of that particular building material and method. That is, until someone bashed it with a hammer to gain access to the ceiling cavity.
The first thing I did was create a containment zone using thick (6 mil) plastic sheeting attached to the ceiling using double sided mounting tape, duct tape, and masking tape to fully seal off the area.
I would need to cut out a large patch to access the drain from below, and repair the damaged ceiling. Cutting along clean, straight, and square lines ensured the patch will be easy to repair later on. I used an oscillating multi-tool.
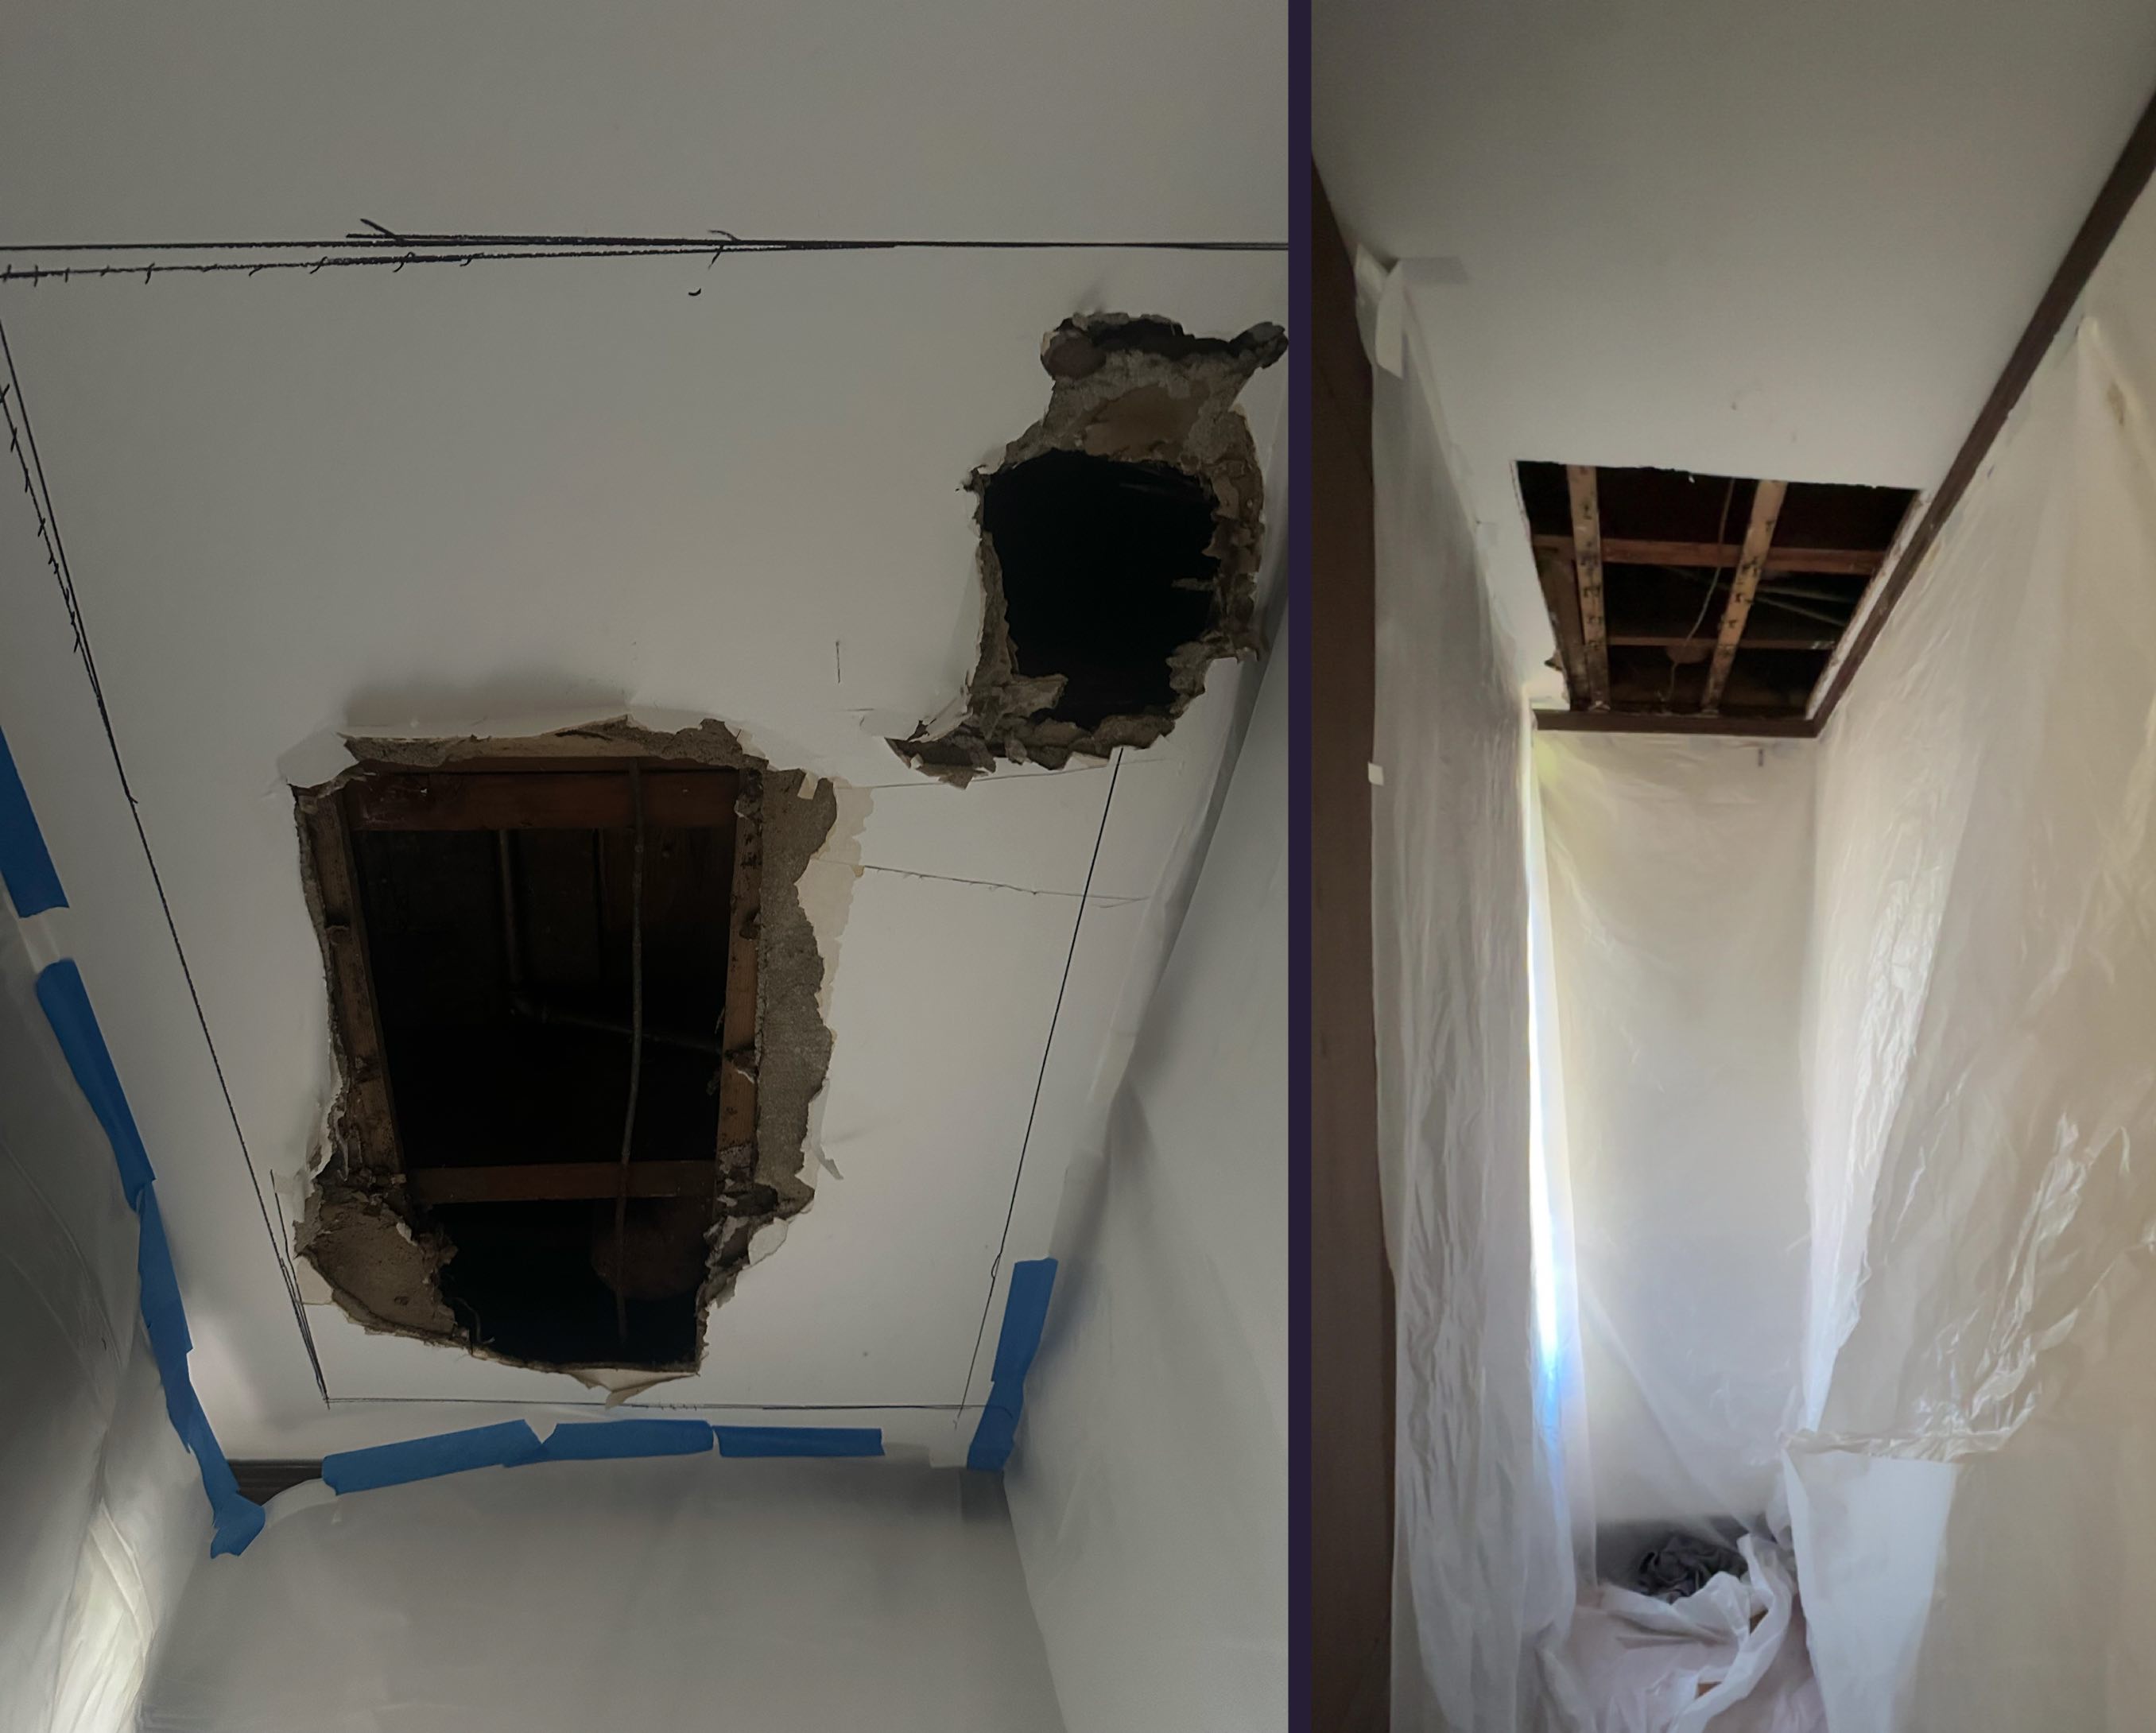
First, I verified that the electric cables were abandoned and not energized.
Antique Drain Assembly
Once I had the underside exposed, I was able to quickly identify that the leak was at the junction between the shower pan and the cast iron barrel trap. I did extensive research but was not able to find much information about this kind of drain assembly, which motivated me to document the repair and ultimately publish this piece.
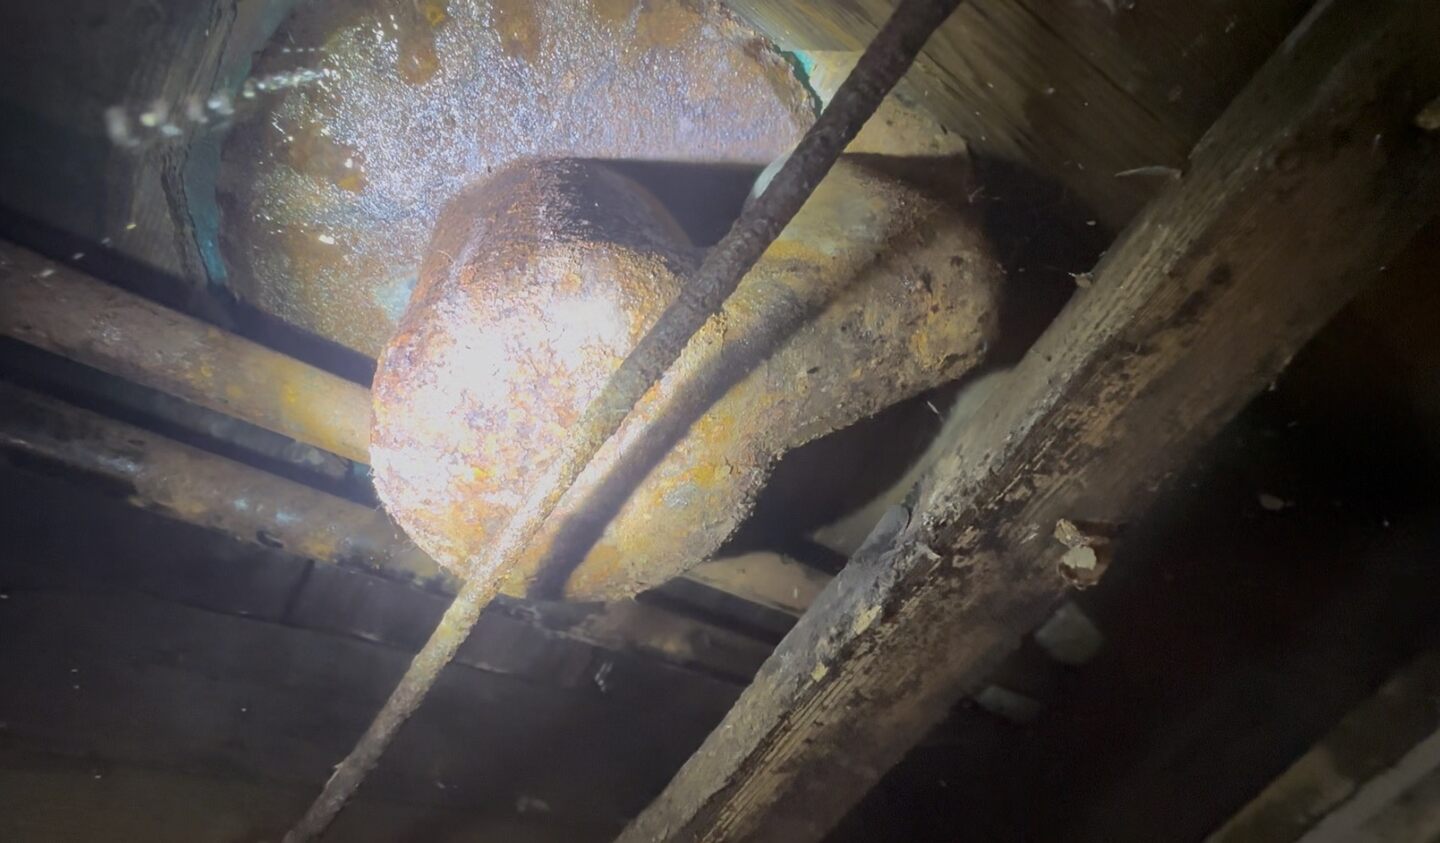
Due to the high degree of corrosion on the cast iron, and limited access in the ceiling cavity, I was not confident that I could seal it against the copper pan. Therefore I resolved to remove it entirely.
Excising the Old Drain
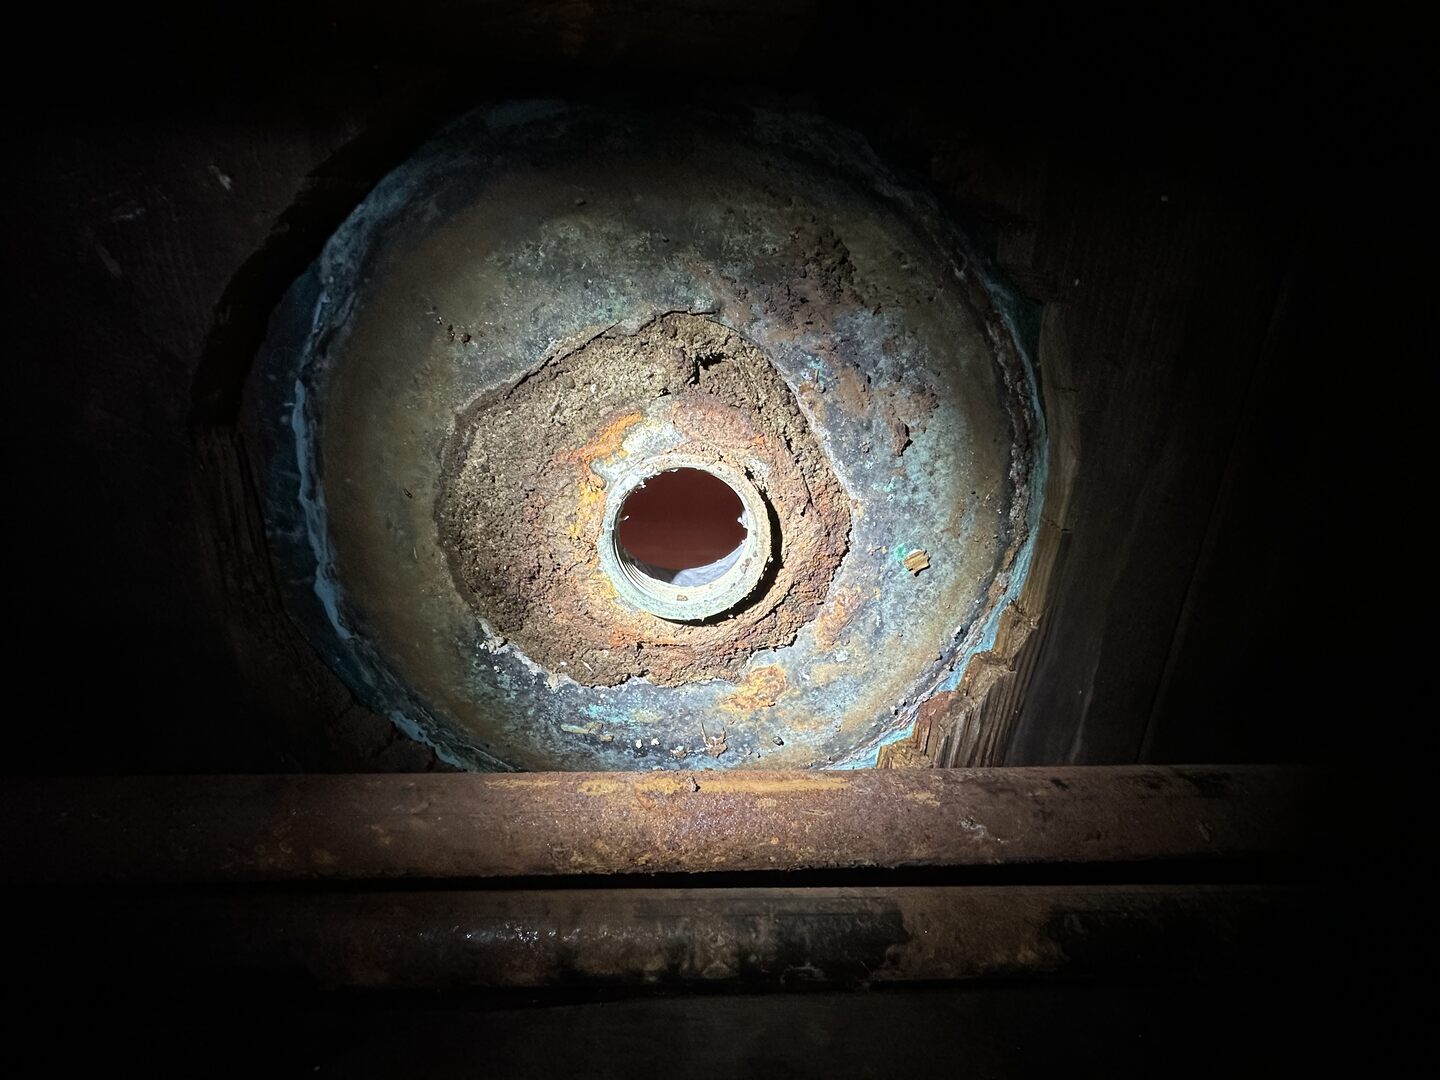
To do so, I cut the galvanized steel drain pipe that the barrel trap connected to. Access was tricky due to the joist, minimal clearance above to the subfloor, and surrounding pipe work. First I used an angle grinder with an abrasive cutting disk. I find the angle grinder to be the fastest way to cut through steel which would make it more likely that I could produce a clean cut. However, they have poor reach due to the nature of their cutting action although the tool itself is fairly compact and maneuverable. After cutting as much as I could with the angle grinder, I used a reciprocating saw with various carbide blades ranging from 4 to 8 inches long. The longer blades provided the reach needed, but presented challenges due to their tendency to jam and bend.
It took about 30 minuted to make the cut, but the resulting face was neat and well aligned - a perfect mating surface for the rubber repair coupling I would later use.
Video I sent flexing my cutting skills to my friend.
Once the pipe was cut there was nothing really holding the old barrel trap to the pan, so it fell away exposing the bottom of the pan and what appeared to be either corroded solder or oakum.
Exposing the Shower Pan
To expose the shower pan, I would have to cut away the tile above. I drew a neat square around the drain and used an angle grinder with a diamond coated masonry blade to cut the tile. I had to use extreme caution not to cut too deep and damage the shower pan. Cutting masonry and ceramic typically generates a lot of dust because the saw works via an abrasive action, so I used a steady stream of water to avoid that issue.
Once a clean perimeter was cut, I made several more relief cuts within the material being removed, and gingerly chipped away at the tile and underlying mortar with a rotary hammer drill set to jack hammer mode. Again, I had to use extreme caution not to plunge the chisel too deep and puncture the shower pan.
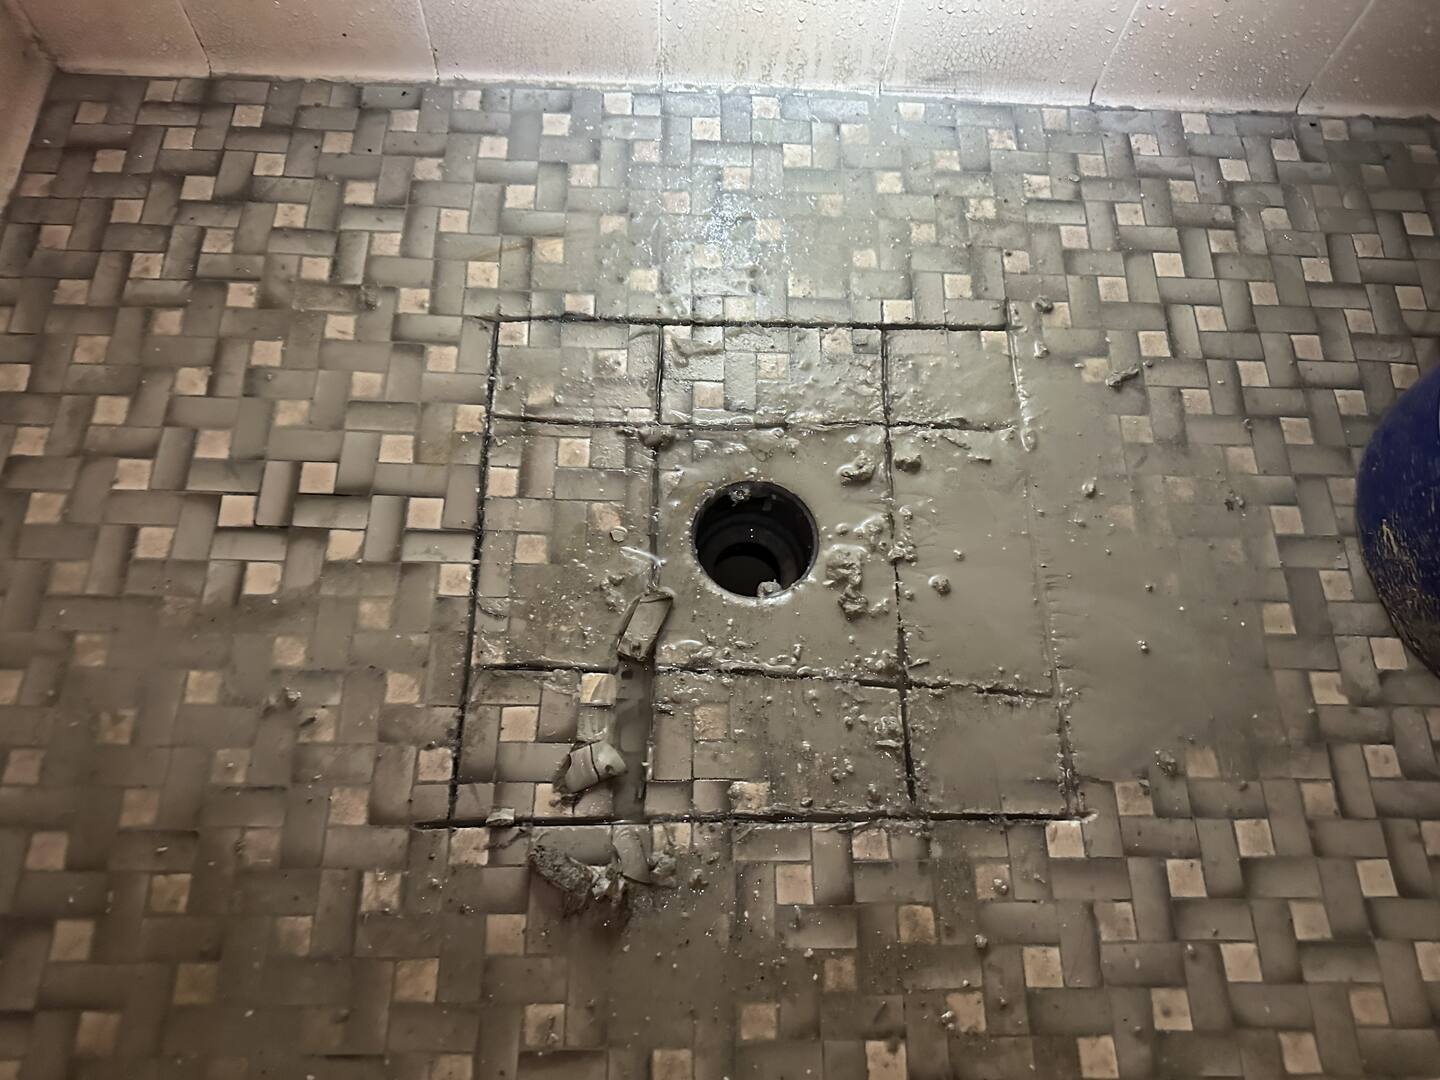
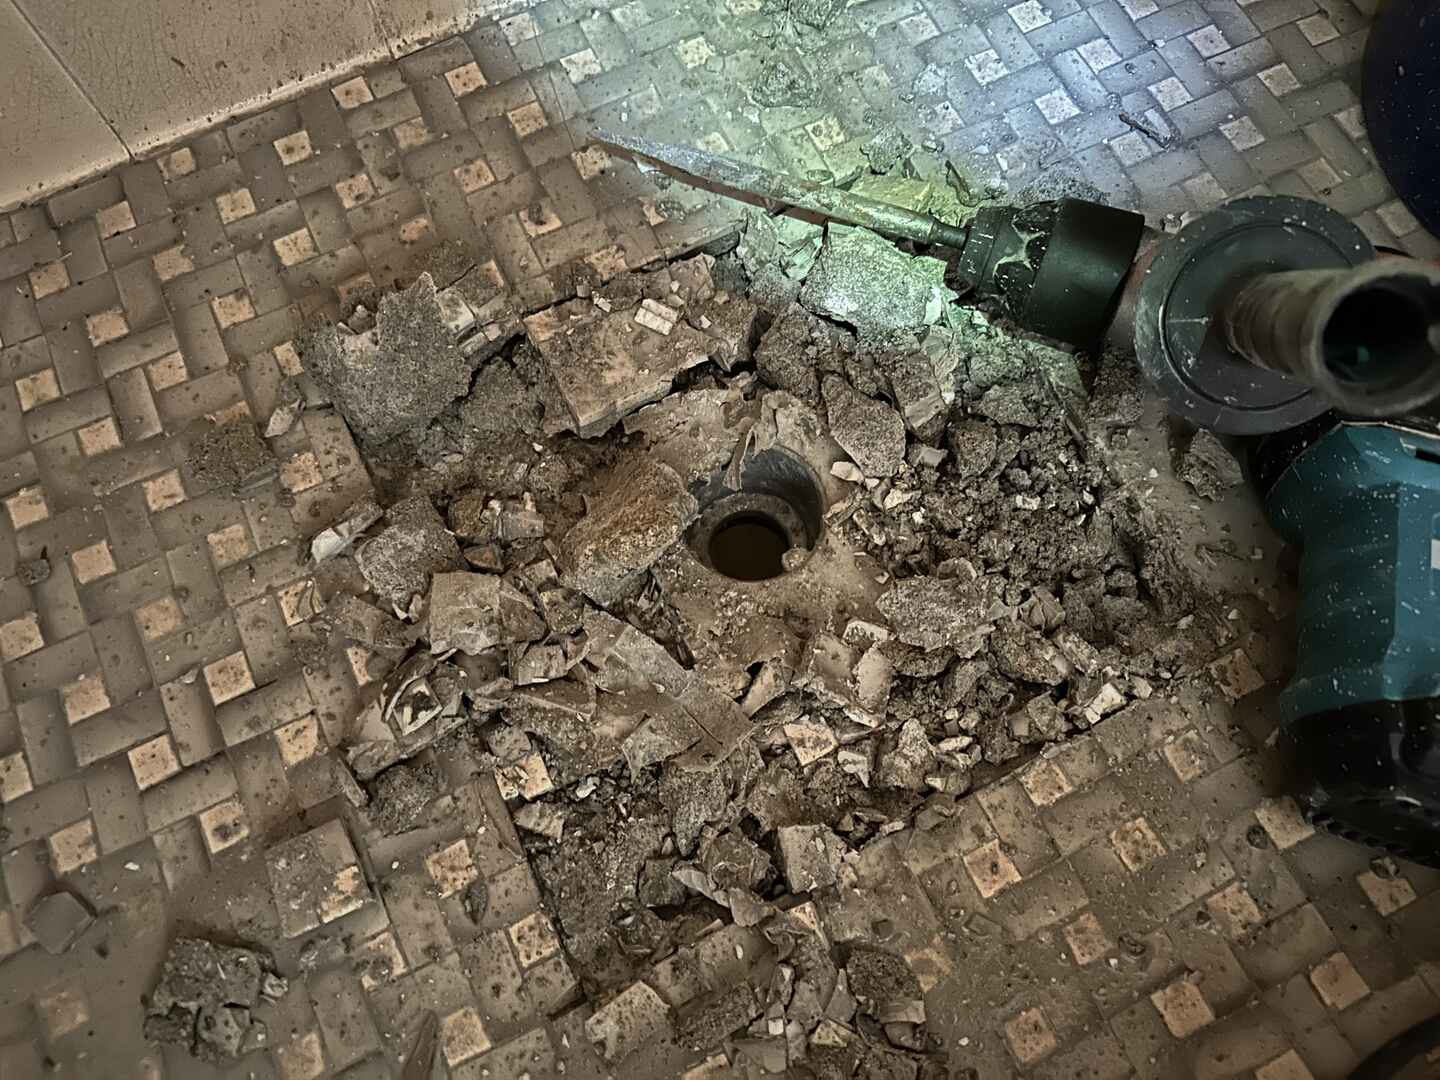
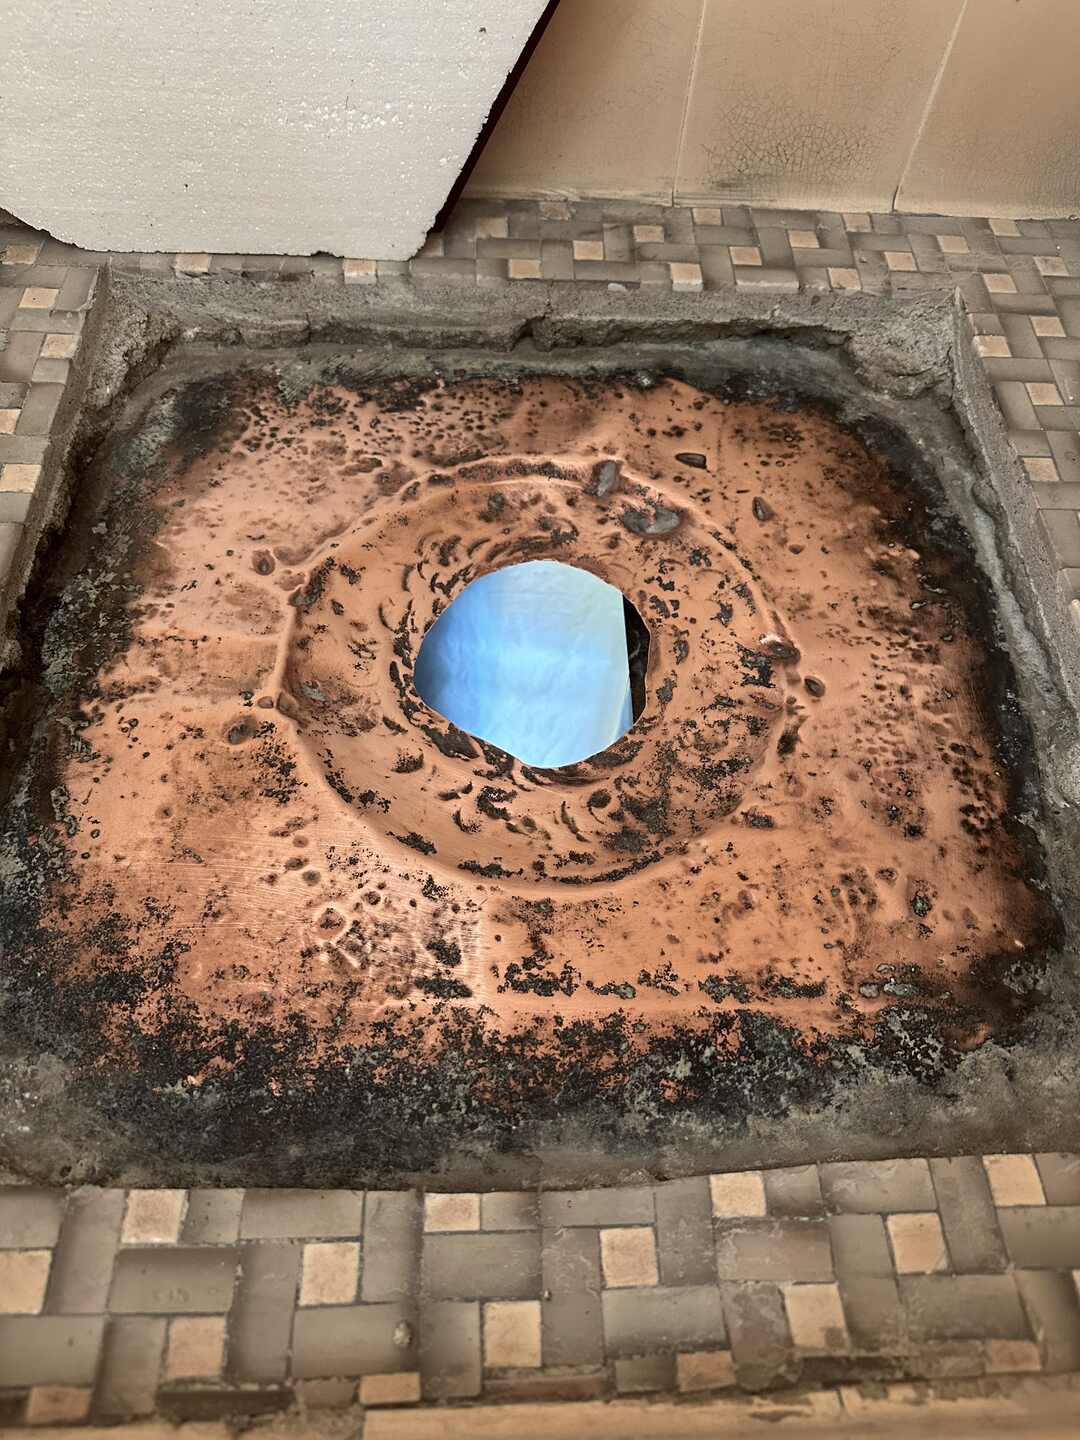
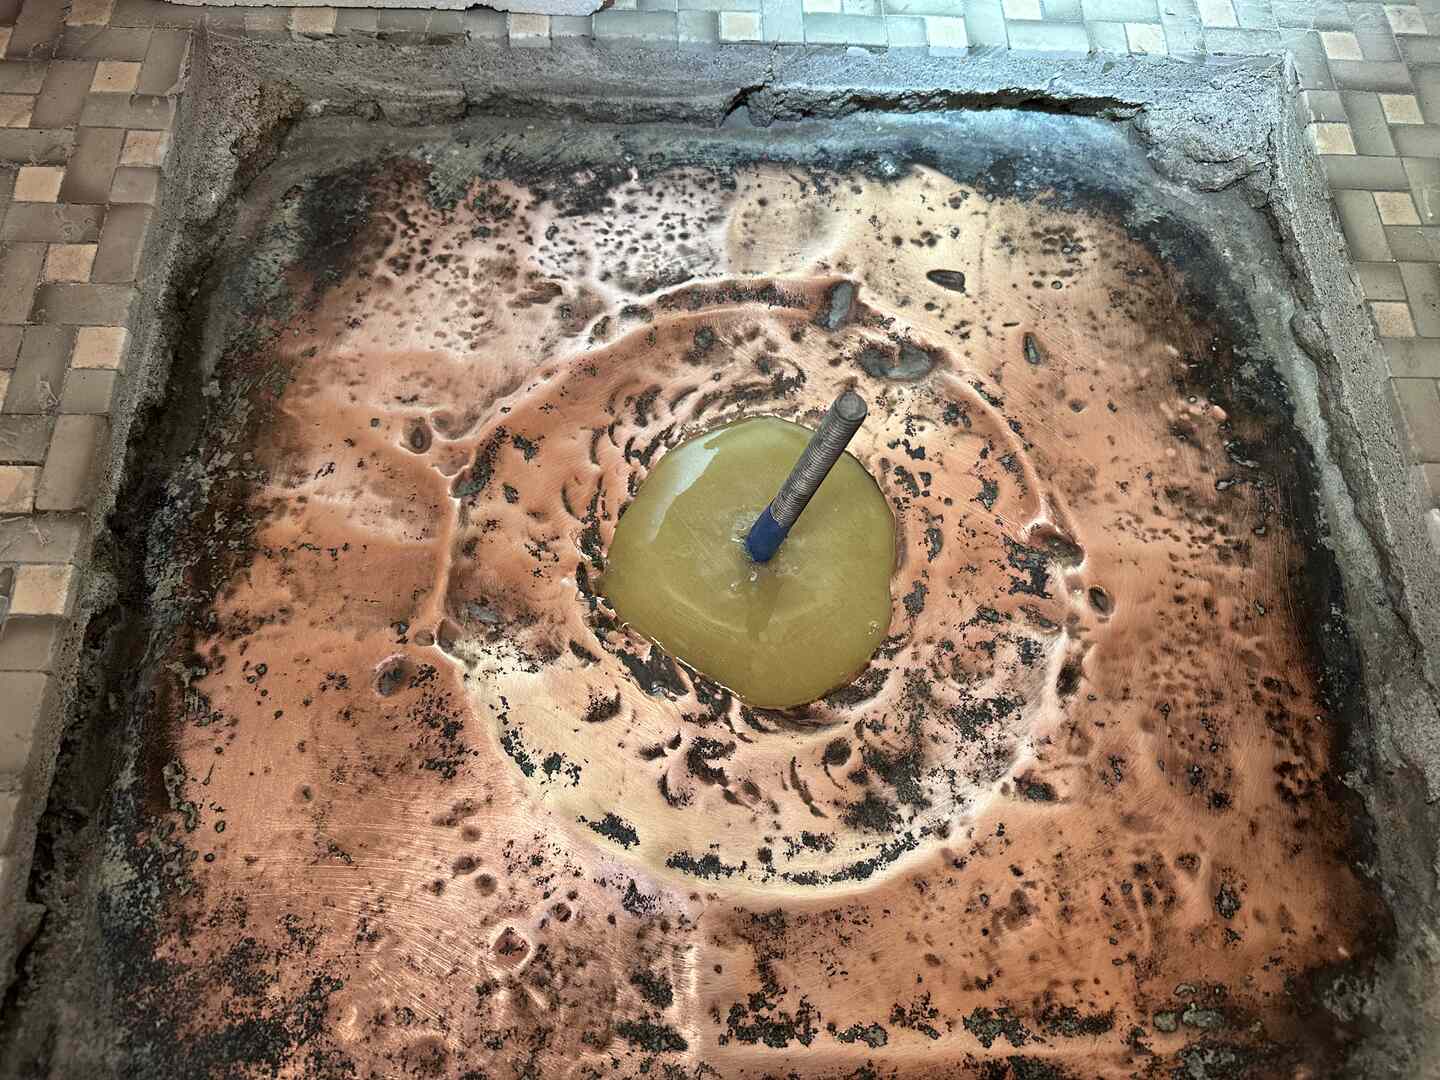
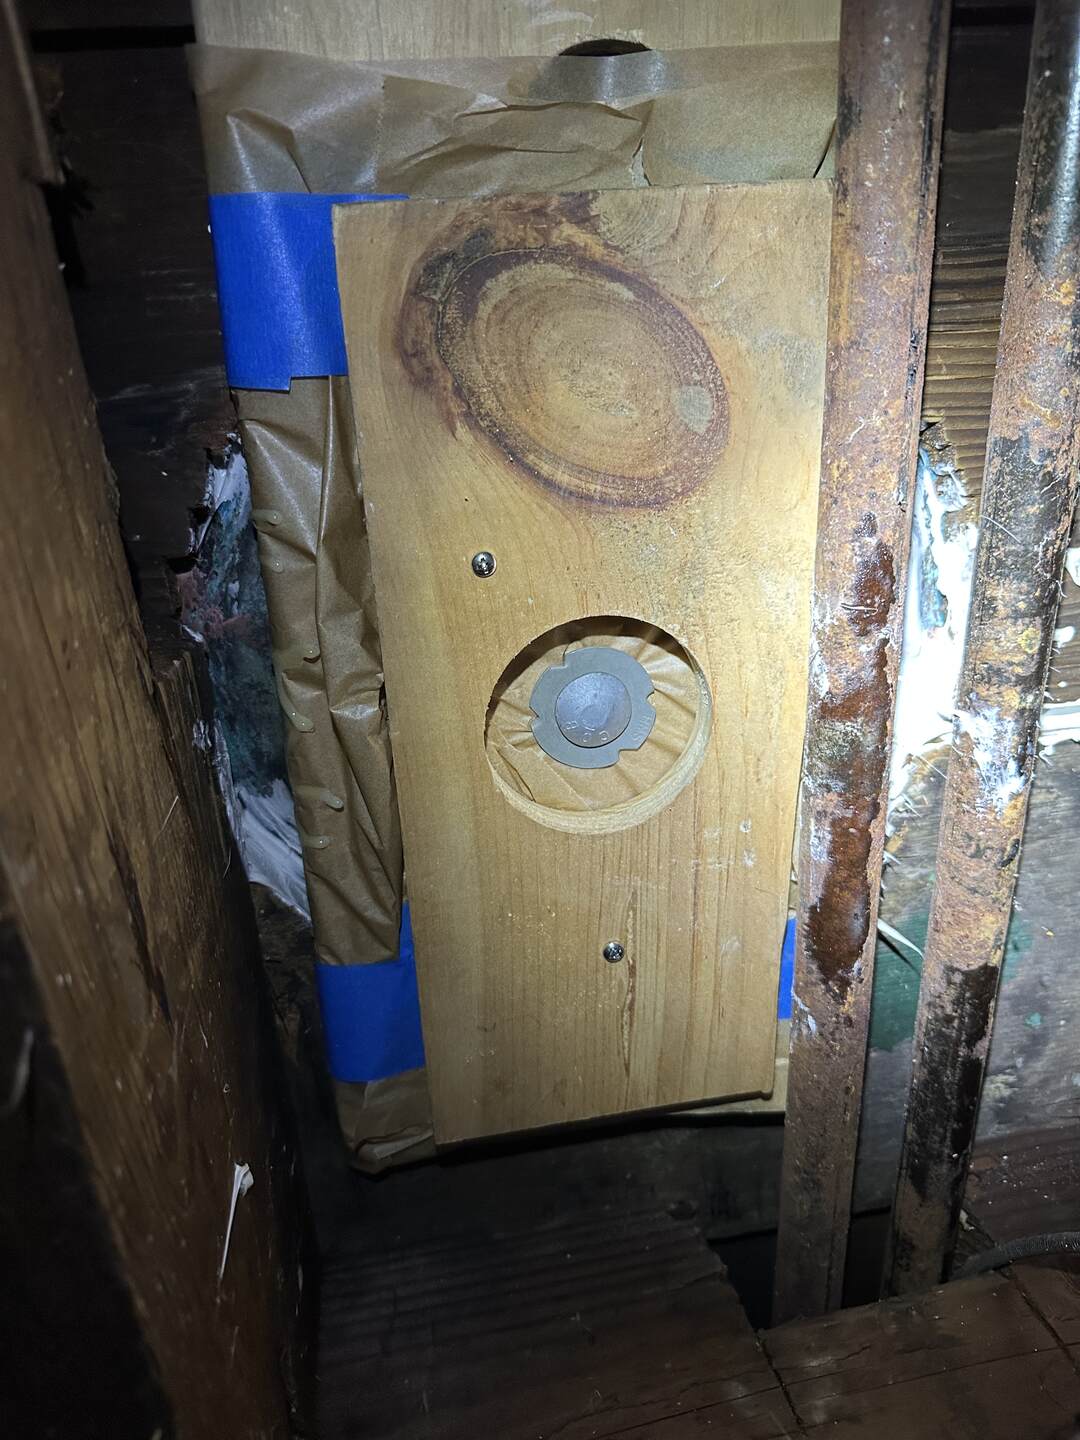
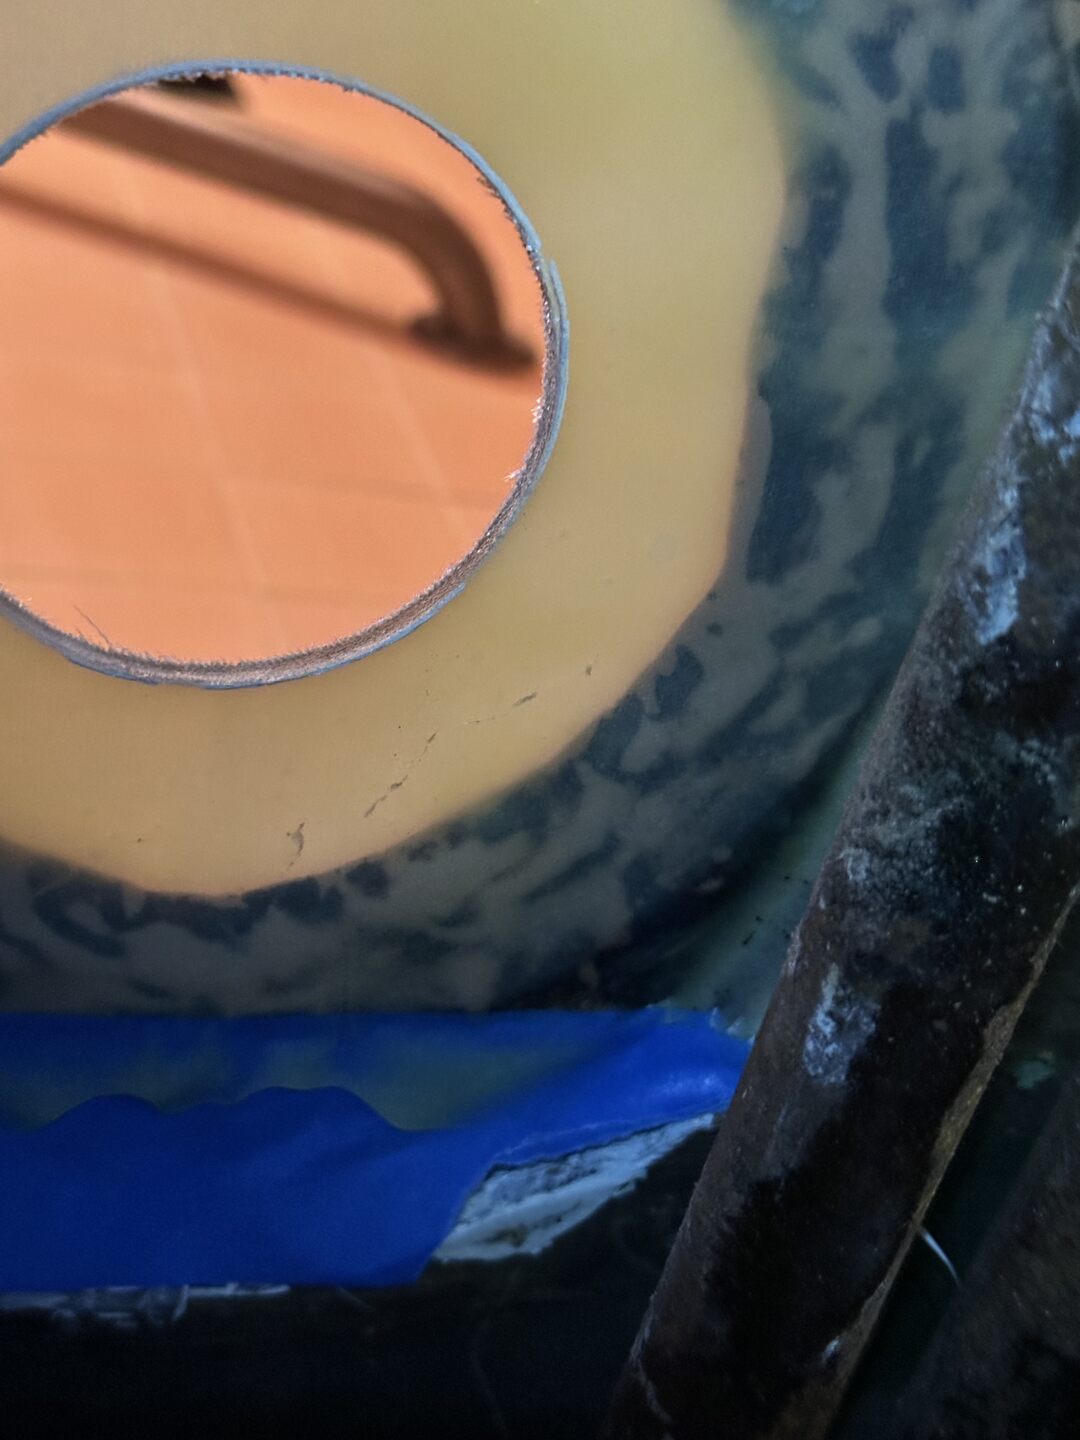
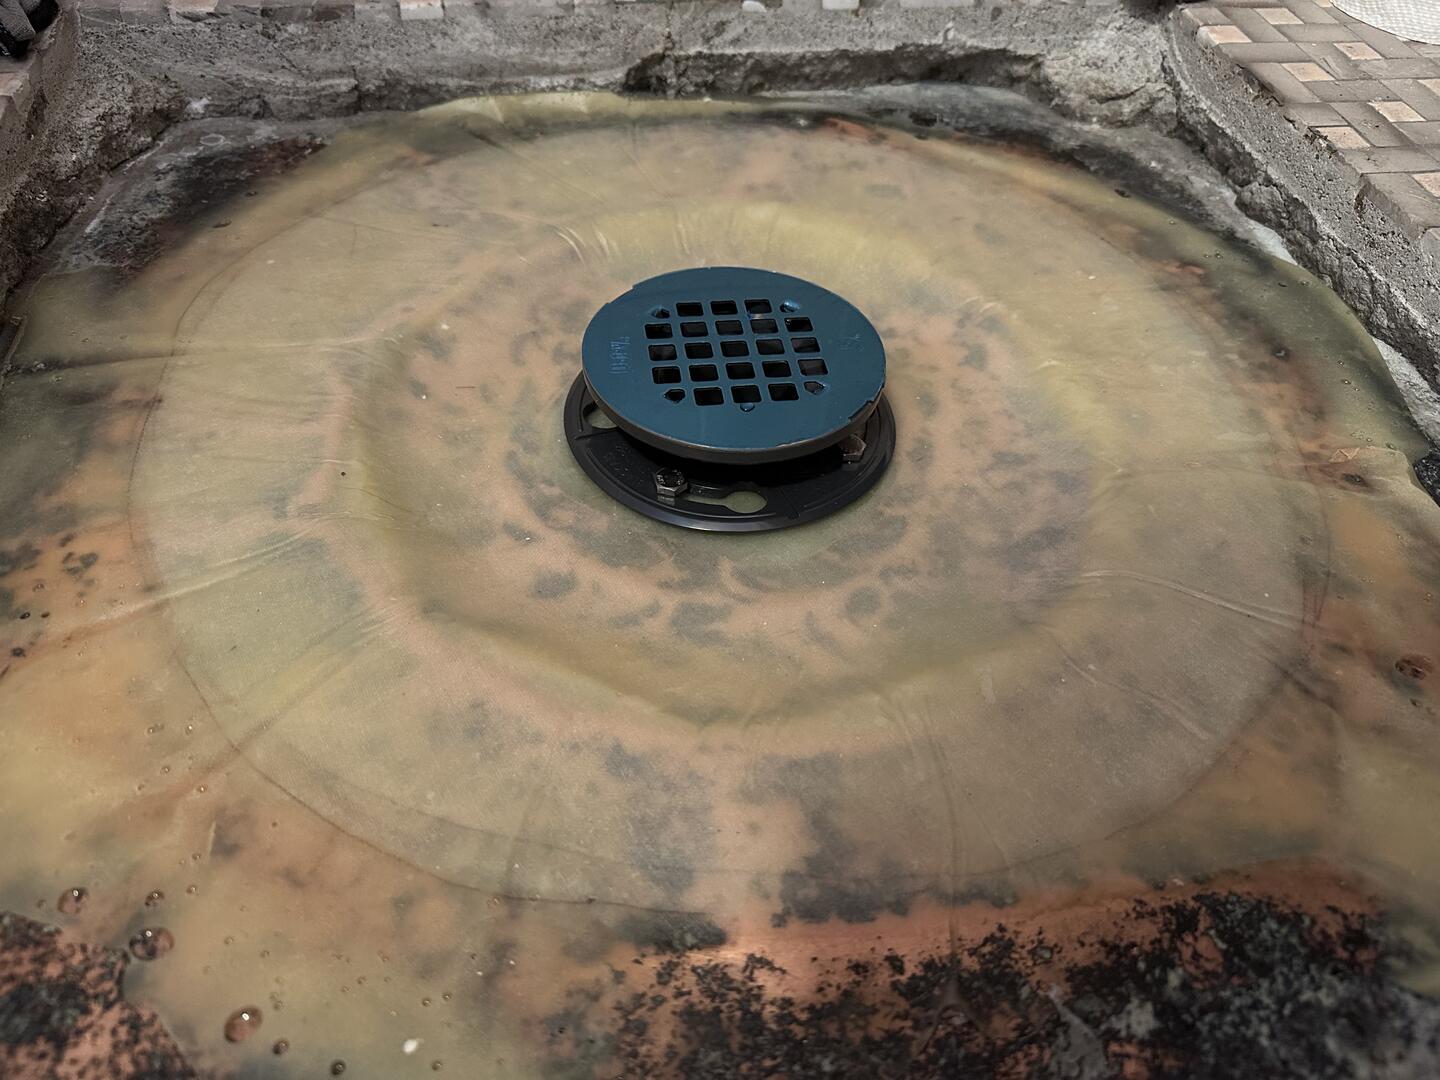
Soon the shower pan was exposed, however; it was very deformed around the drain so I realized I would need to cut a larger section of tile away to expose more of the pan. Using the same cutting technique, I enlarged the perimeter and chipped away more tile.
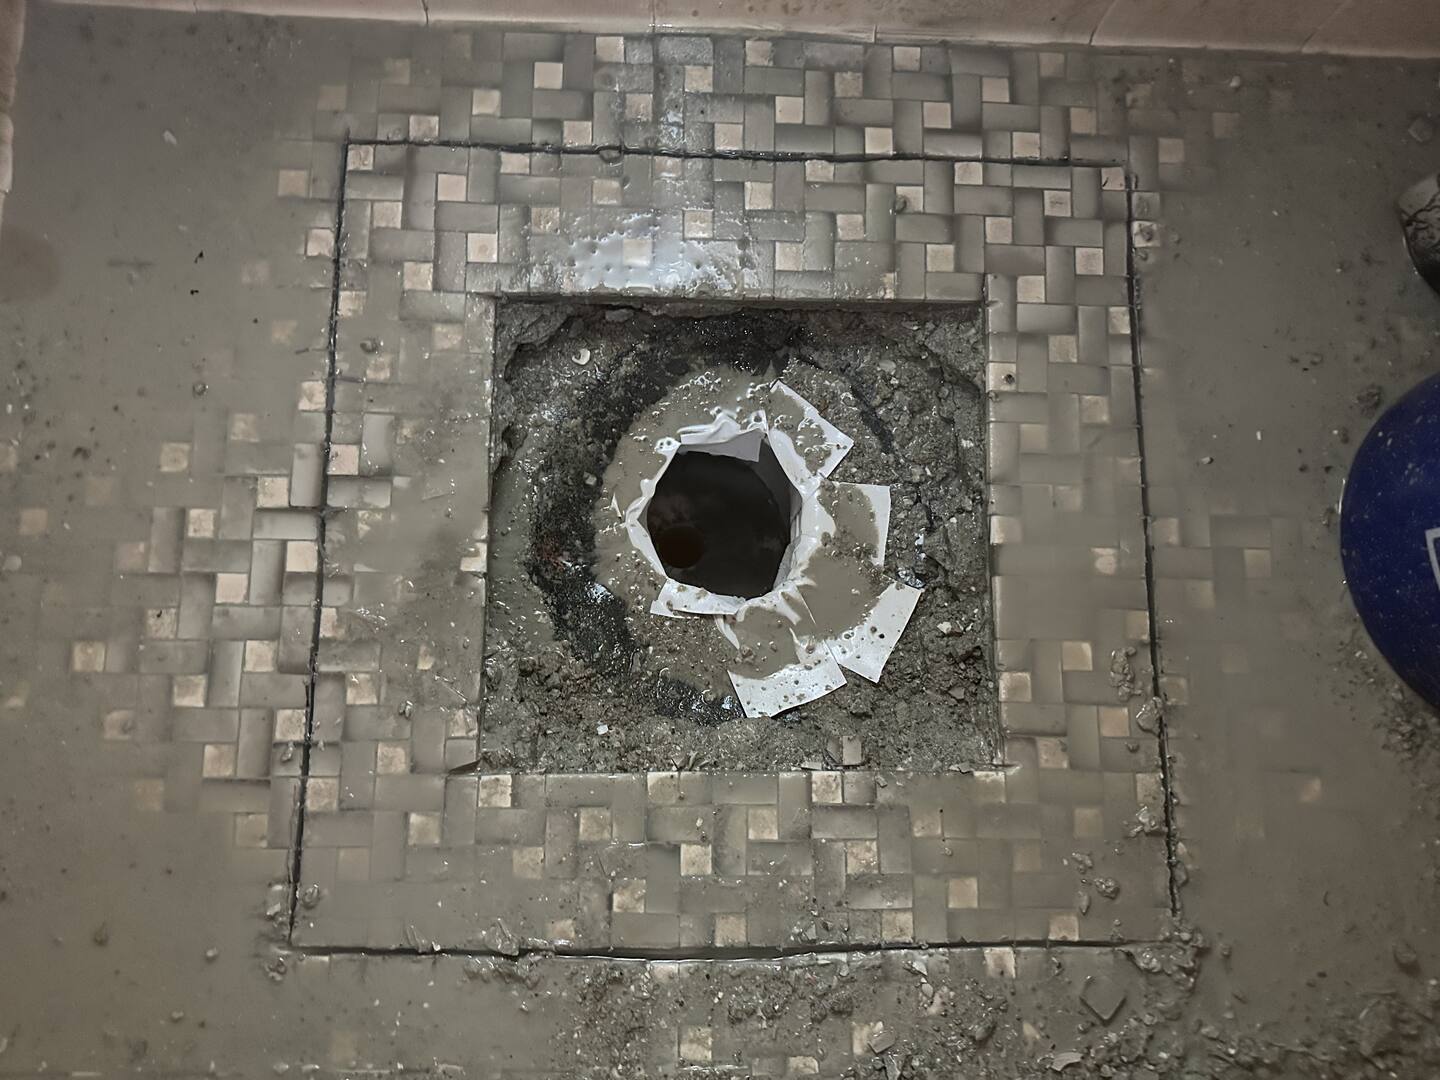
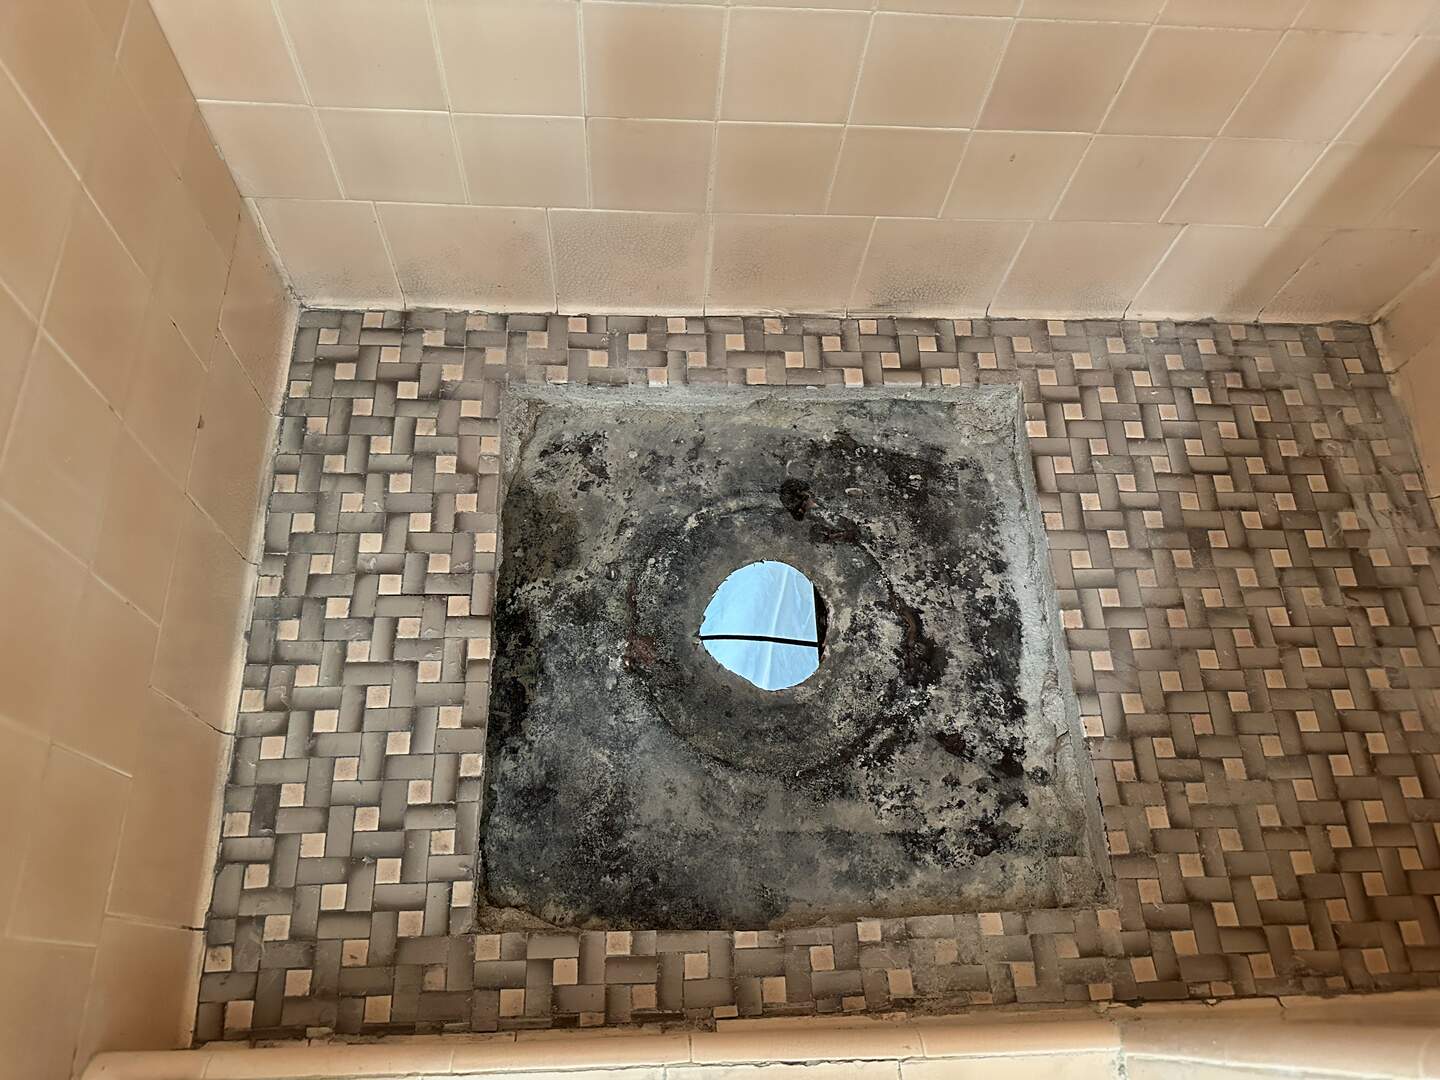
Finally I had the shower pan exposed. The photo below clearly shows the deformed area around the old drain assembly. It also shows the extent of cement residue and oxidation on the copper which would all need to be removed so that the epoxy patch can properly adhere.
Prepping the Copper with Acid
To clear the masonry residue and oxidation from the surface of the copper shower pan, I chose to use both chemical and mechanical means.
First I started with a wire brush to knock away large, loose chunks of mortar still stuck to the copper. I quickly realized that the wire brush would not be able to fully strip away all of the residue, so I resorted to an acid.
I decided to use sulfamic acid because it is readily available, and strong without being too corrosive or hazardous like hydrochloric or sulfuric acid. I still took significant handling precautions while using it, including thick PCV coated gloves and a full face acid gas respirator.
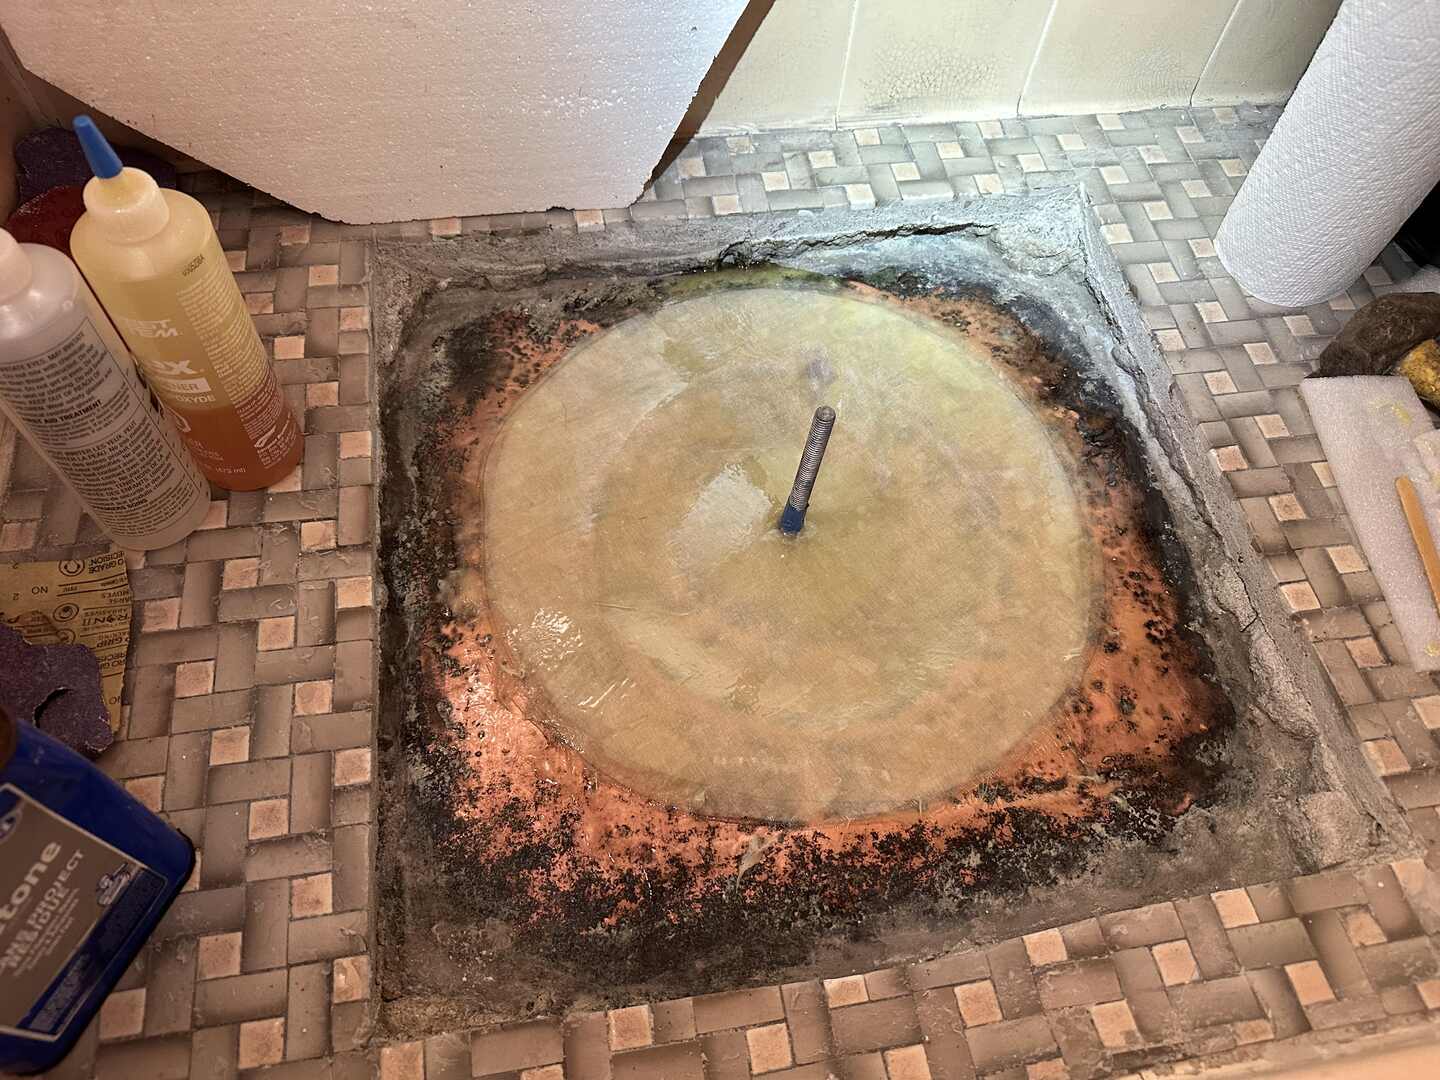
I used paper towels soaked in a sulfamic acid solution and applied to the pan to allow the acid to dwell on the surface without running to other parts of the pan or dripping down the drain hole. Baking soda was used between applications to neutralize any remaining acid so as not to etch the copper to a point of damage.
Fiberglass Layup and Concentric Clamping Assembly
The patch to repair the big hole in the copper shower pan would be made of fiberglass and epoxy resin. I chose this material because it can conform to the contours of the pan, is waterproof, semi-flexible, and would bond well with the copper. My plan was to sandwich the copper pan between two layups of fiberglass.
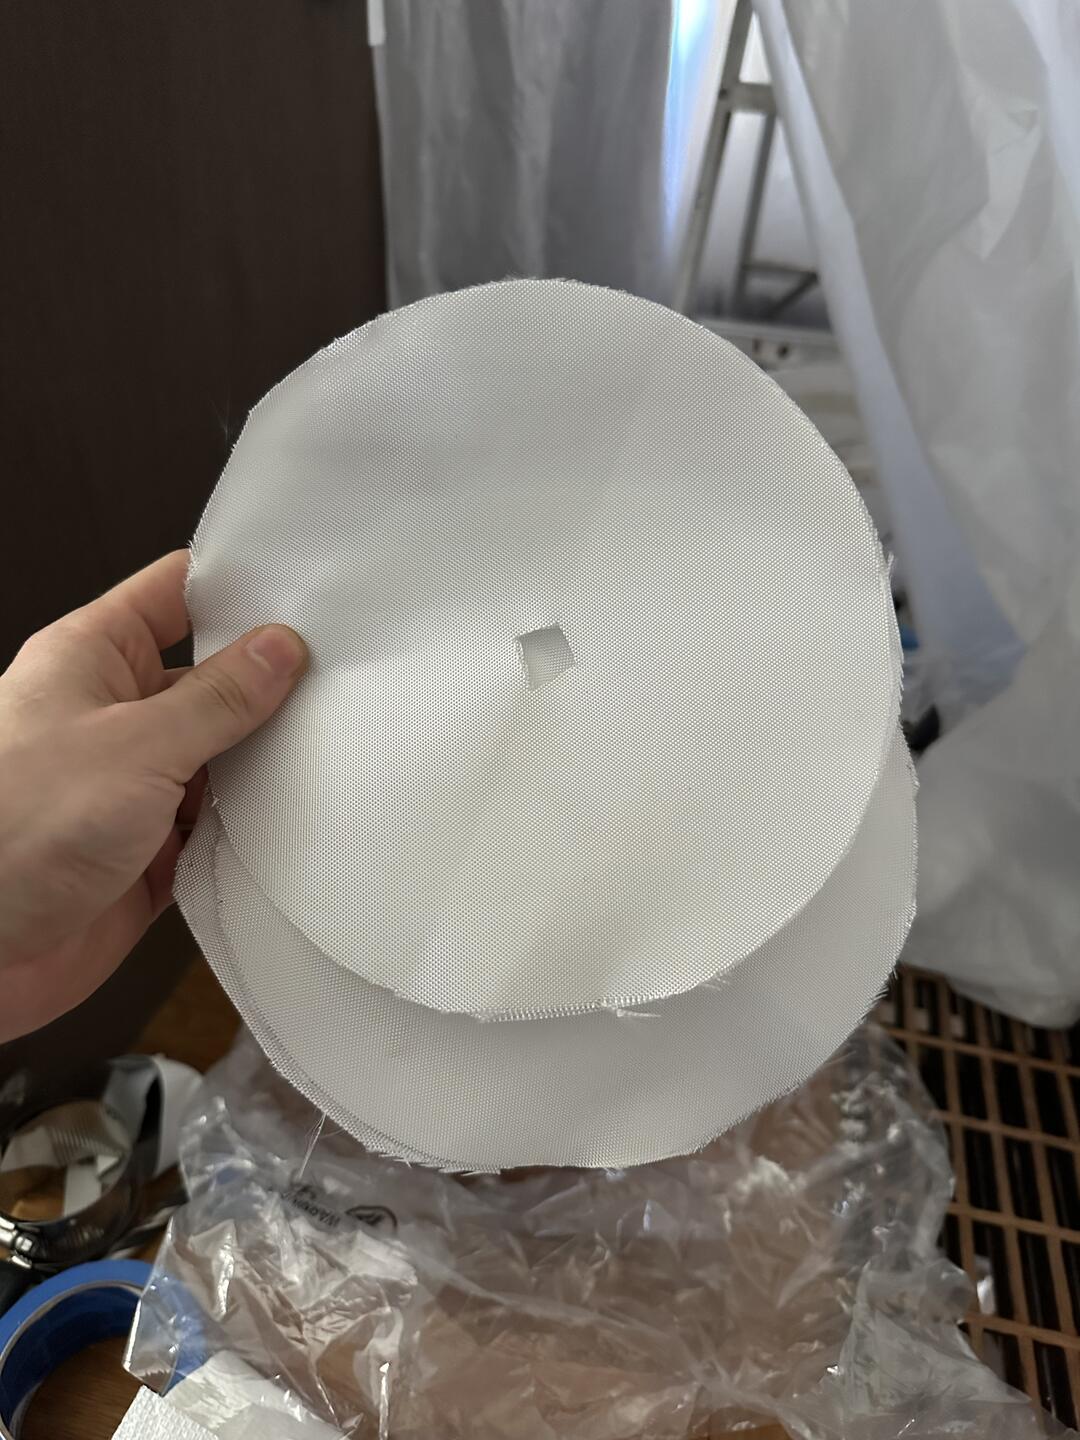
I started by cutting several sheets of 6oz plain woven fiberglass fabric into discs with a small concentric hole for a clamping bolt to pass through. The smaller sheets are for the bottom of the pan, and the larger sheets are for the top.
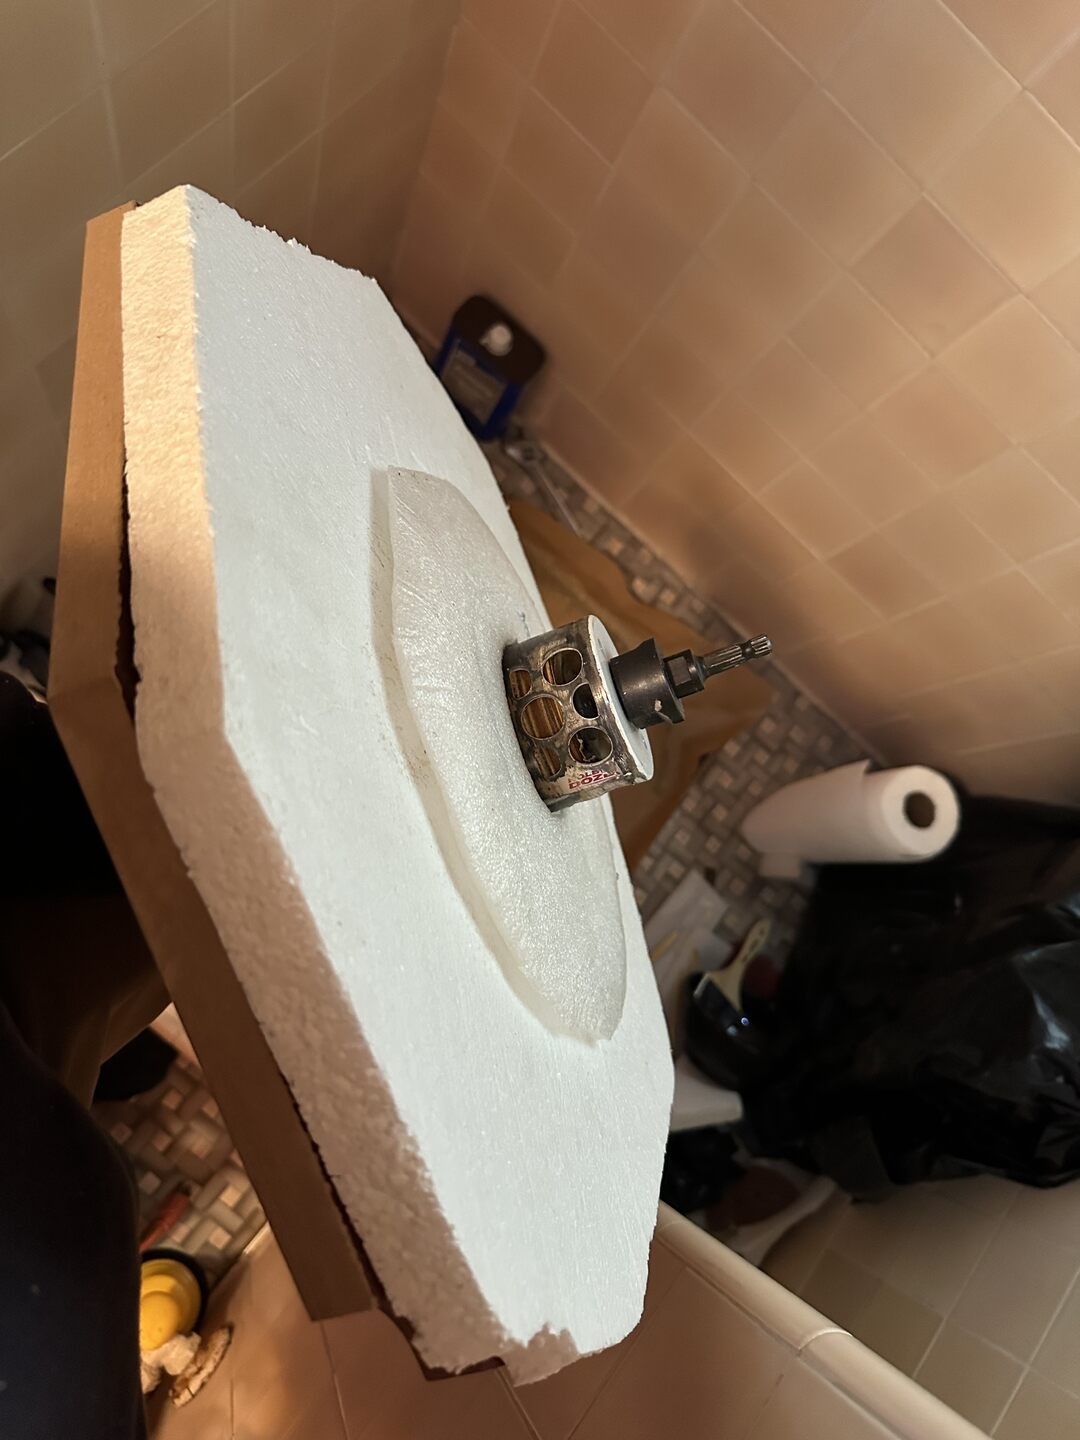
In order to clamp the fiberglass to the pan, I created two plates that would bolt through the middle of the drain. I used contoured pieces of foam to provide even pressure against the variable surface of the pan.
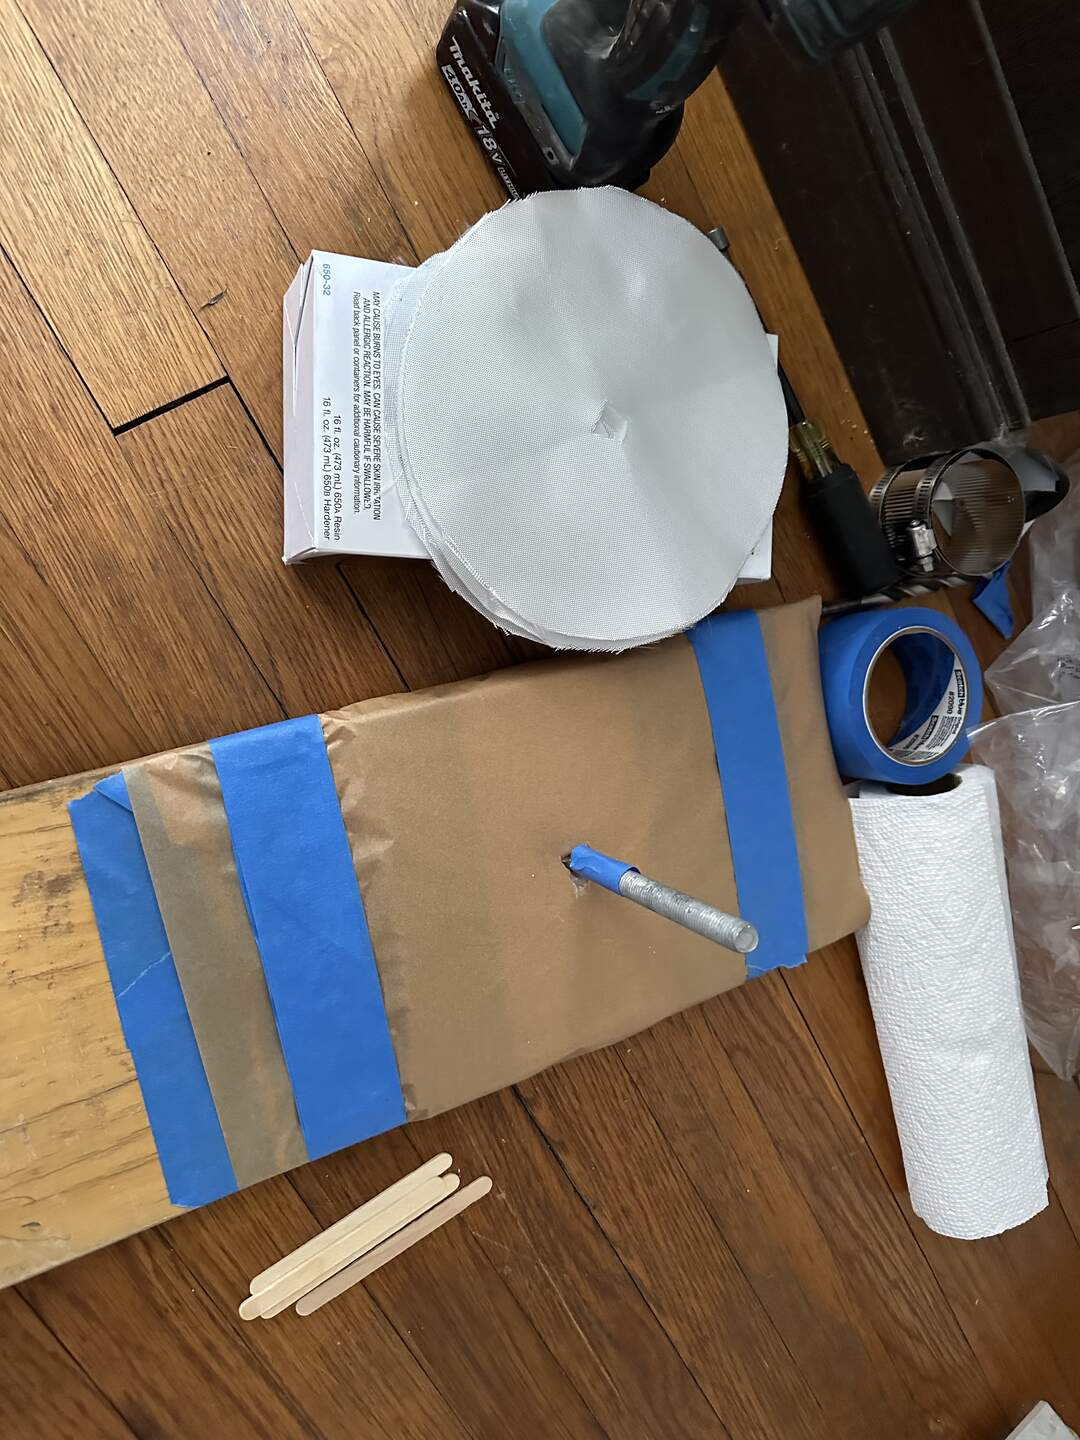
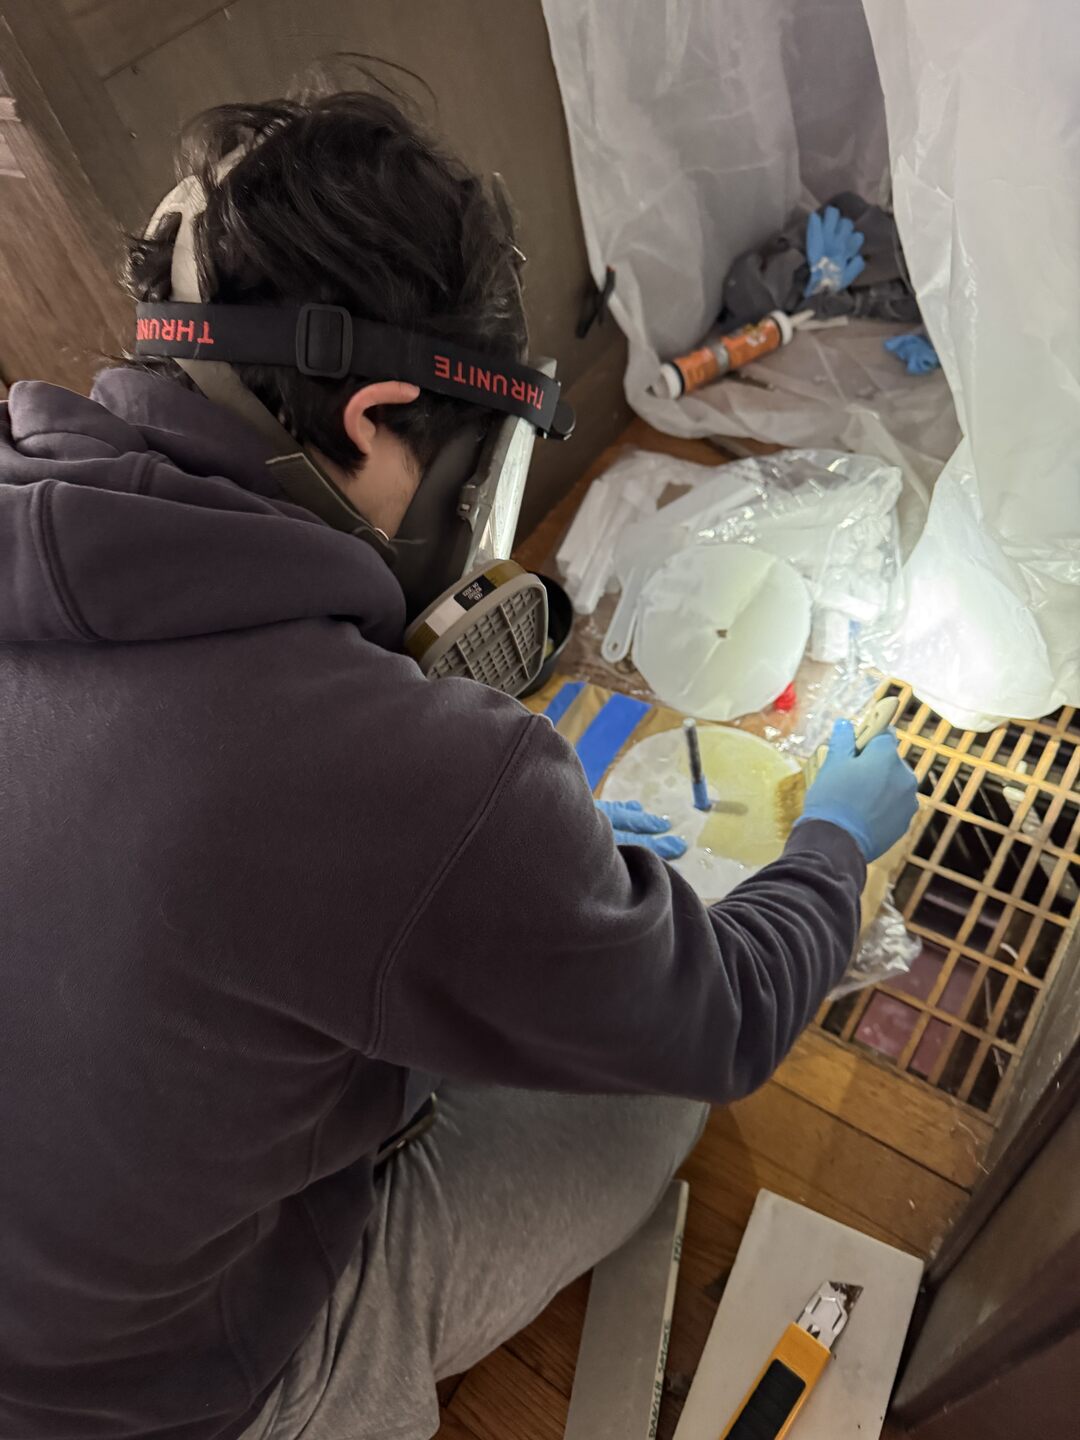
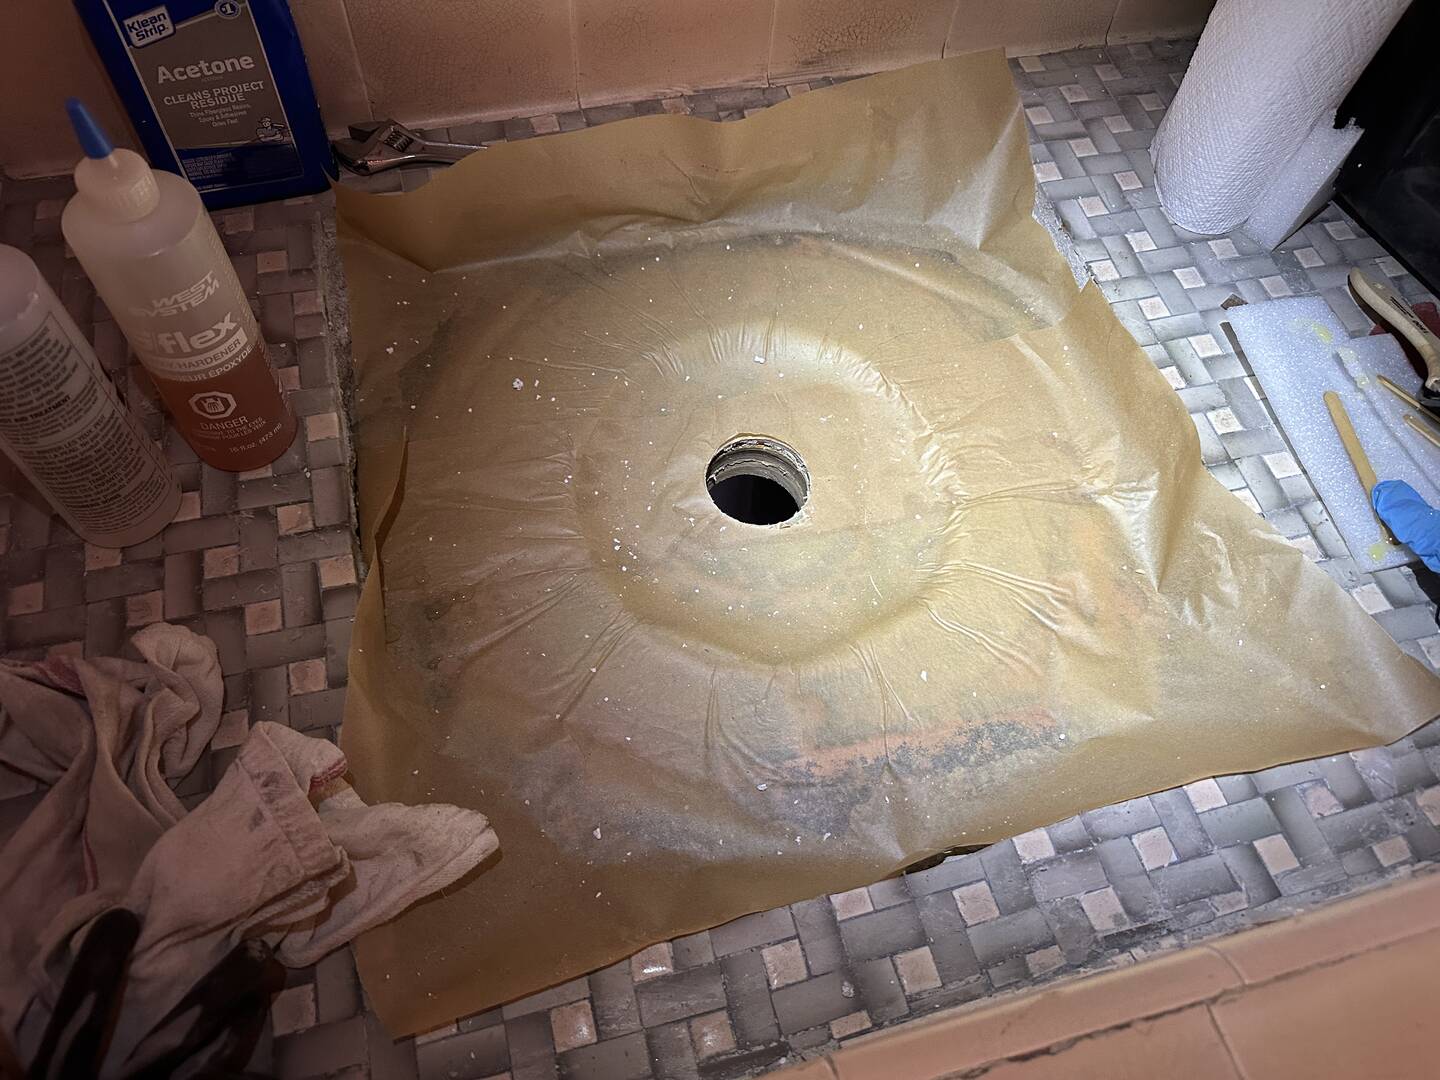
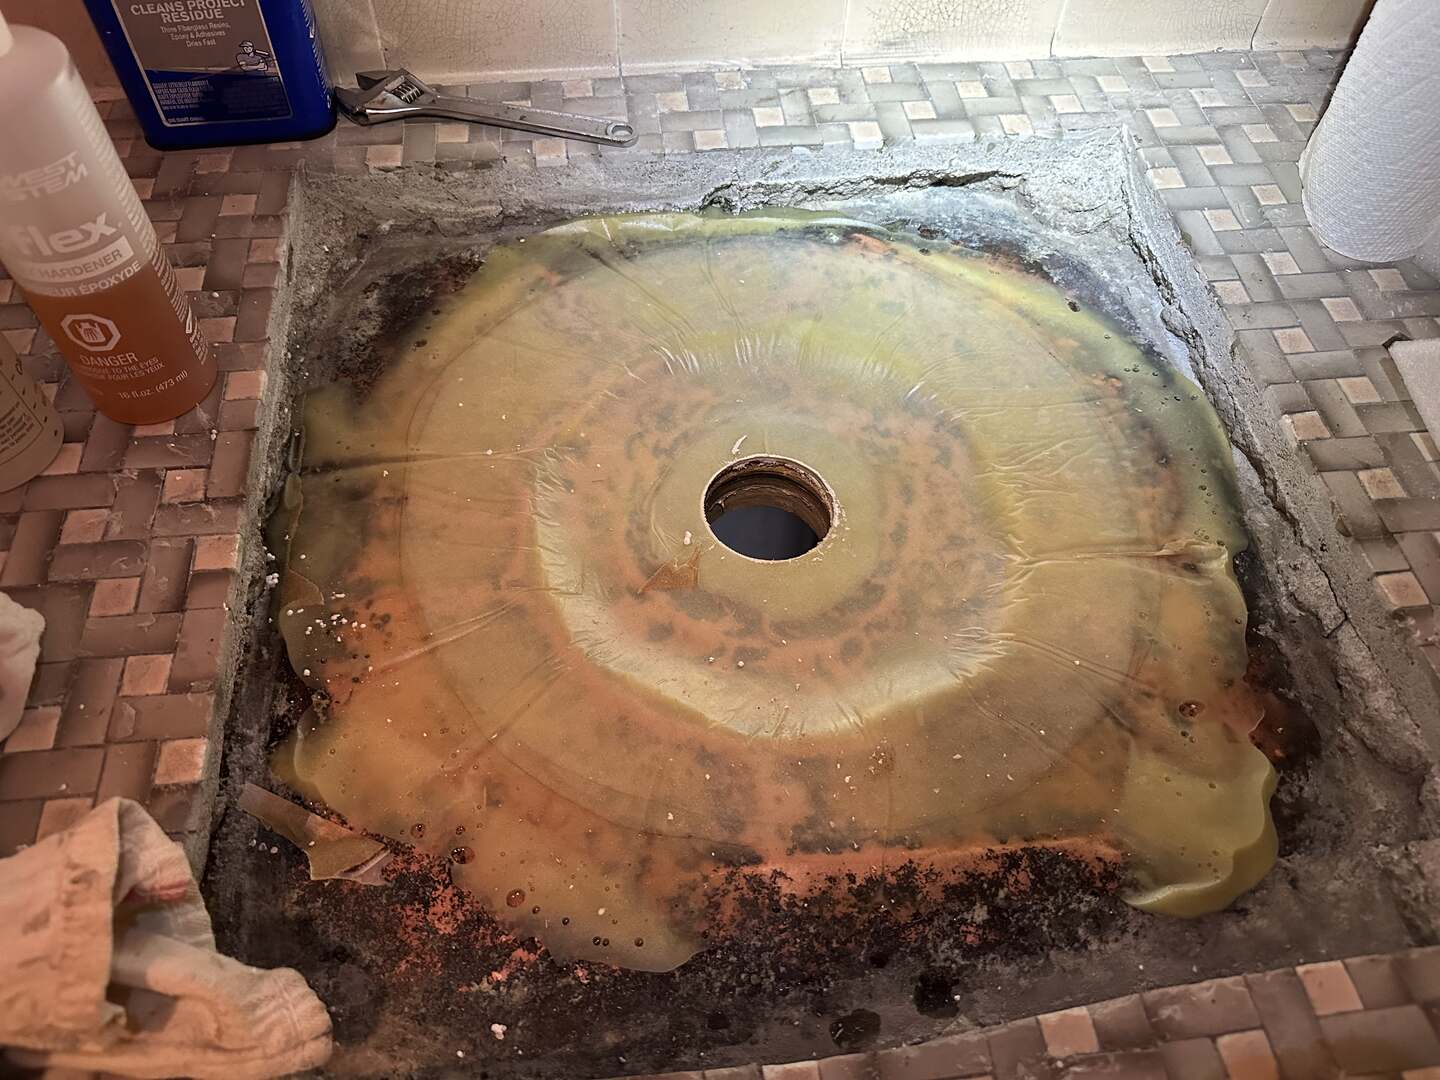
I mixed up some West Systems G-Flex epoxy resin and used a brush to apply it to each sheet as I laid them on to the copper. For the bottom, I laid the wetted fiberglass directly on the clamping plate, using wax paper to prevent it from sticking. Right before applying the sheets, I also cleaned the copper pan with acetone.
Below is how the layup looked with just the bottom layers of fiberglass applied. Note the large concentric bolt that would act as the clamp.
I then applied the top sheets of fiberglass making sure to wet them thoroughly and work out any air bubbled between the layers. The fiberglass becomes translucent when wetted out which helps spot air bubbles.

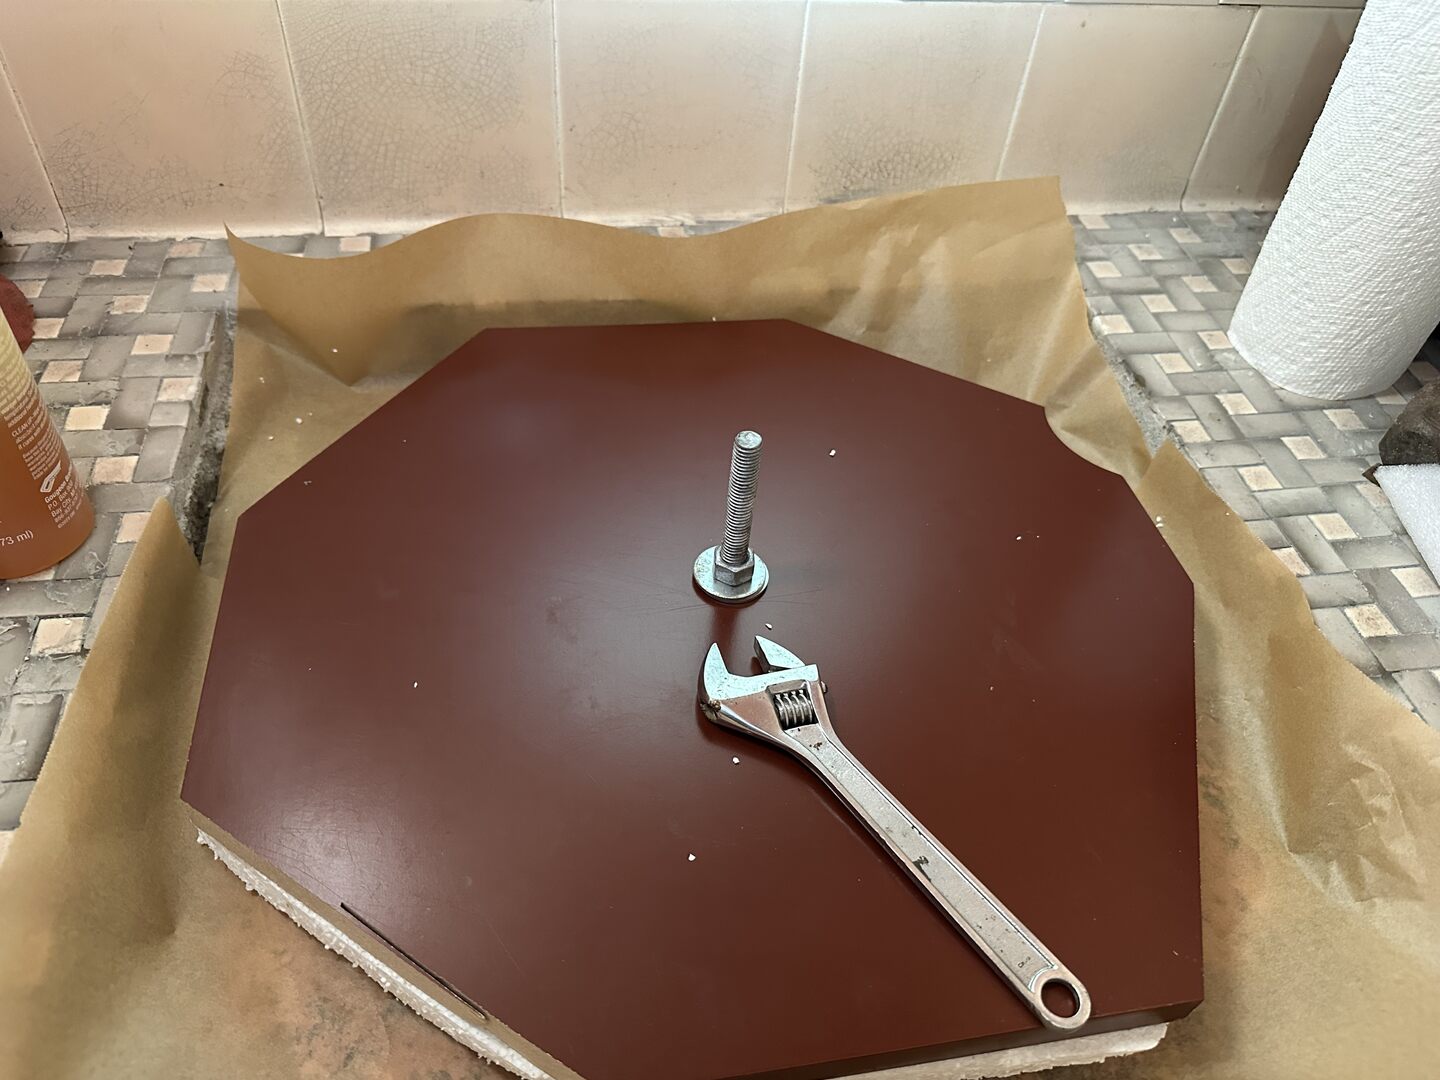
Before placing the top clamping plate, I put down sheets of wax paper to prevent sticking.
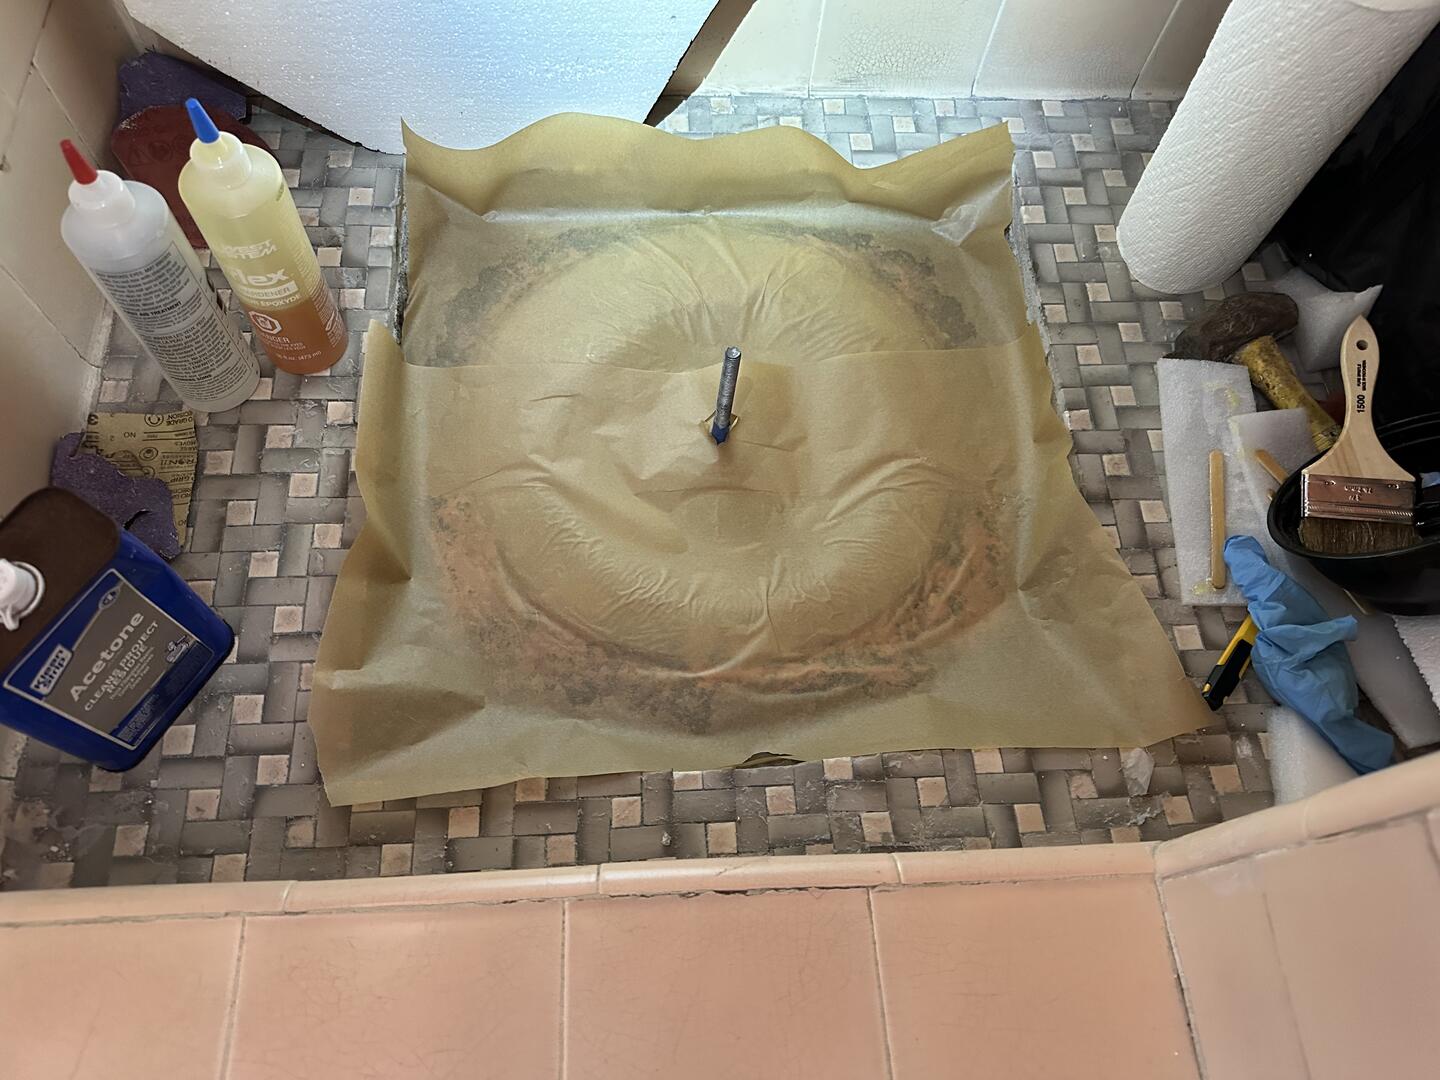
I then used a nut and washer to tightly clamp the top plate, sandwiching the pan between the bottom plate, the bottom layers of fiberglass, the top layers of fiberglass, and the top plate.
Drilling out the Clamp
The bolt used to clamp the top plate became glued to the fiberglass so it could not simply be undone and threaded out. To remove it, I used an annular cutter (hole saw), to completely remove the portion of material around it while simultaneously forming the new drain hole.
I couldn't use the pilot drill with the hole saw because the bolt was already concentric to the drain hole, so I used a board that would guide the hole saw from its outer surface.
Once the hole saw was through the fiberglass, the clamp came loose and could be lifted from above.
The hole saw left a clean drain hole.
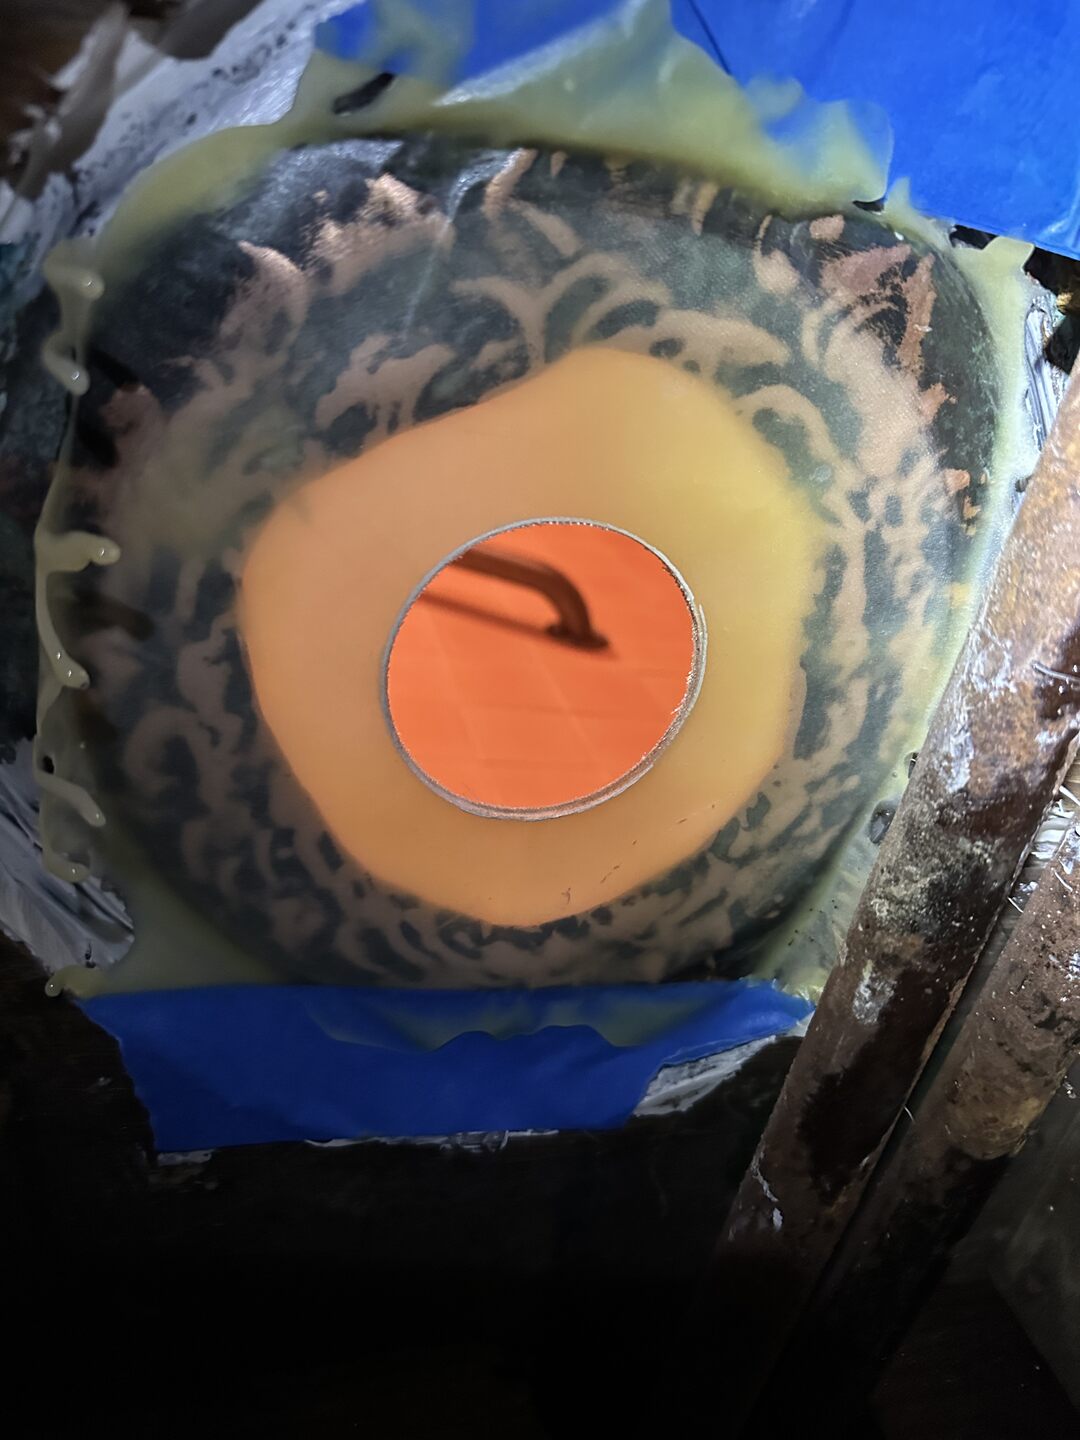
The wax paper worked perfectly and I was able to peel it away to expose the fiberglass for inspection.
The fiberglass patch ended up being about 4mm thick. Looking up at it from the bottom shows a clear view of how it repaired the large hole.
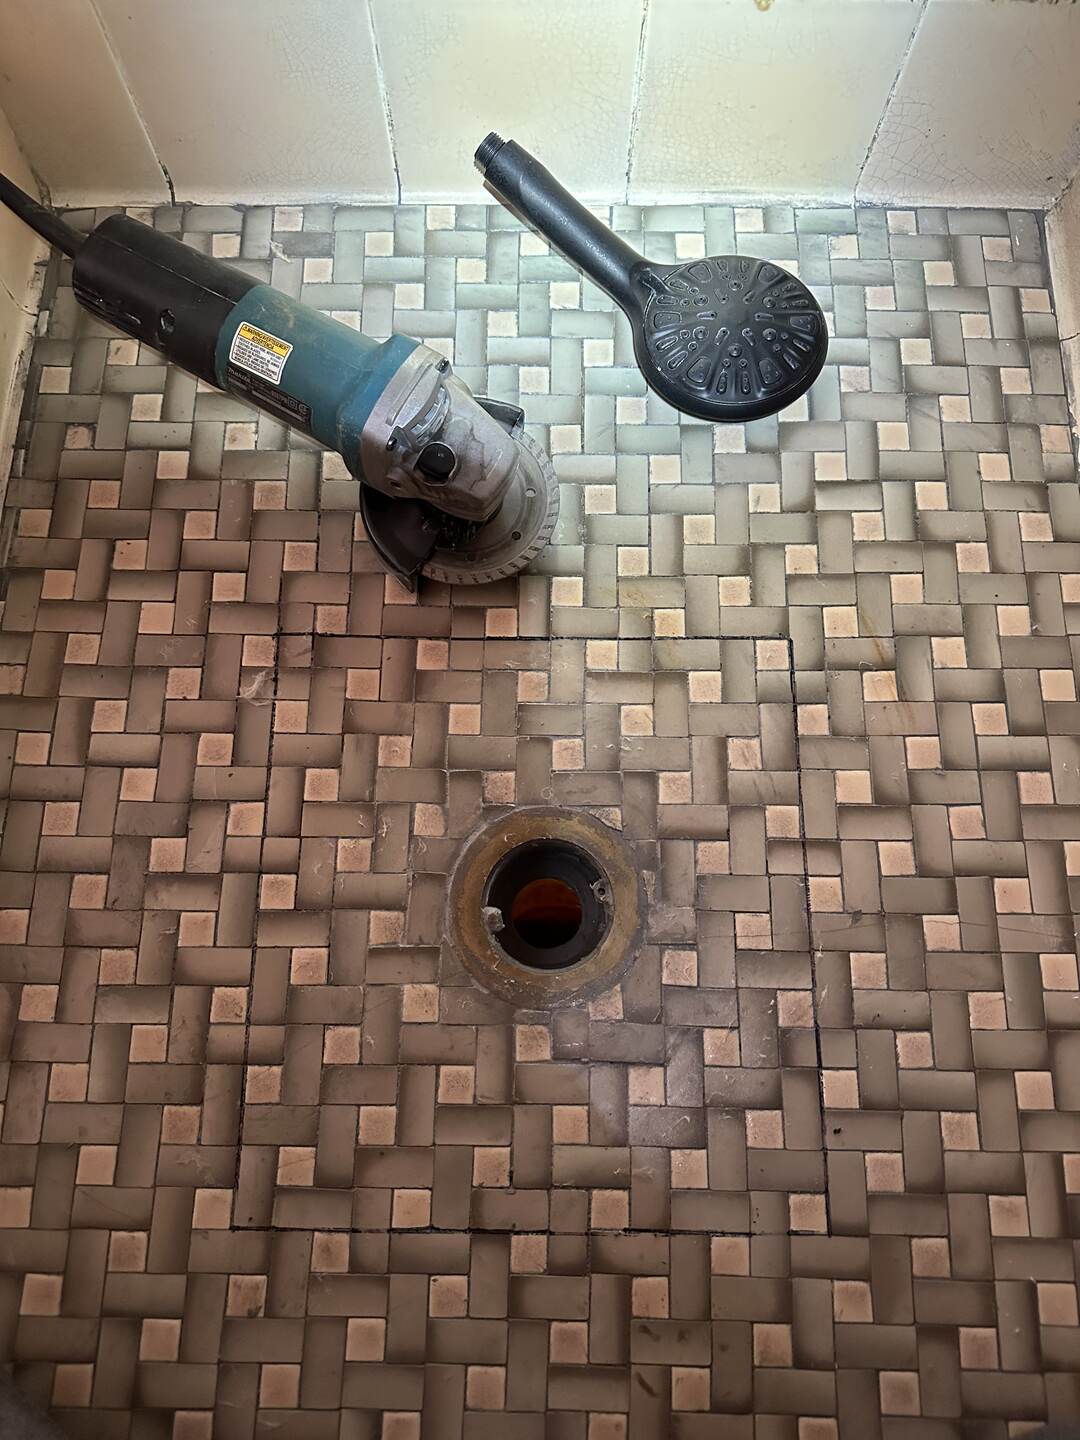
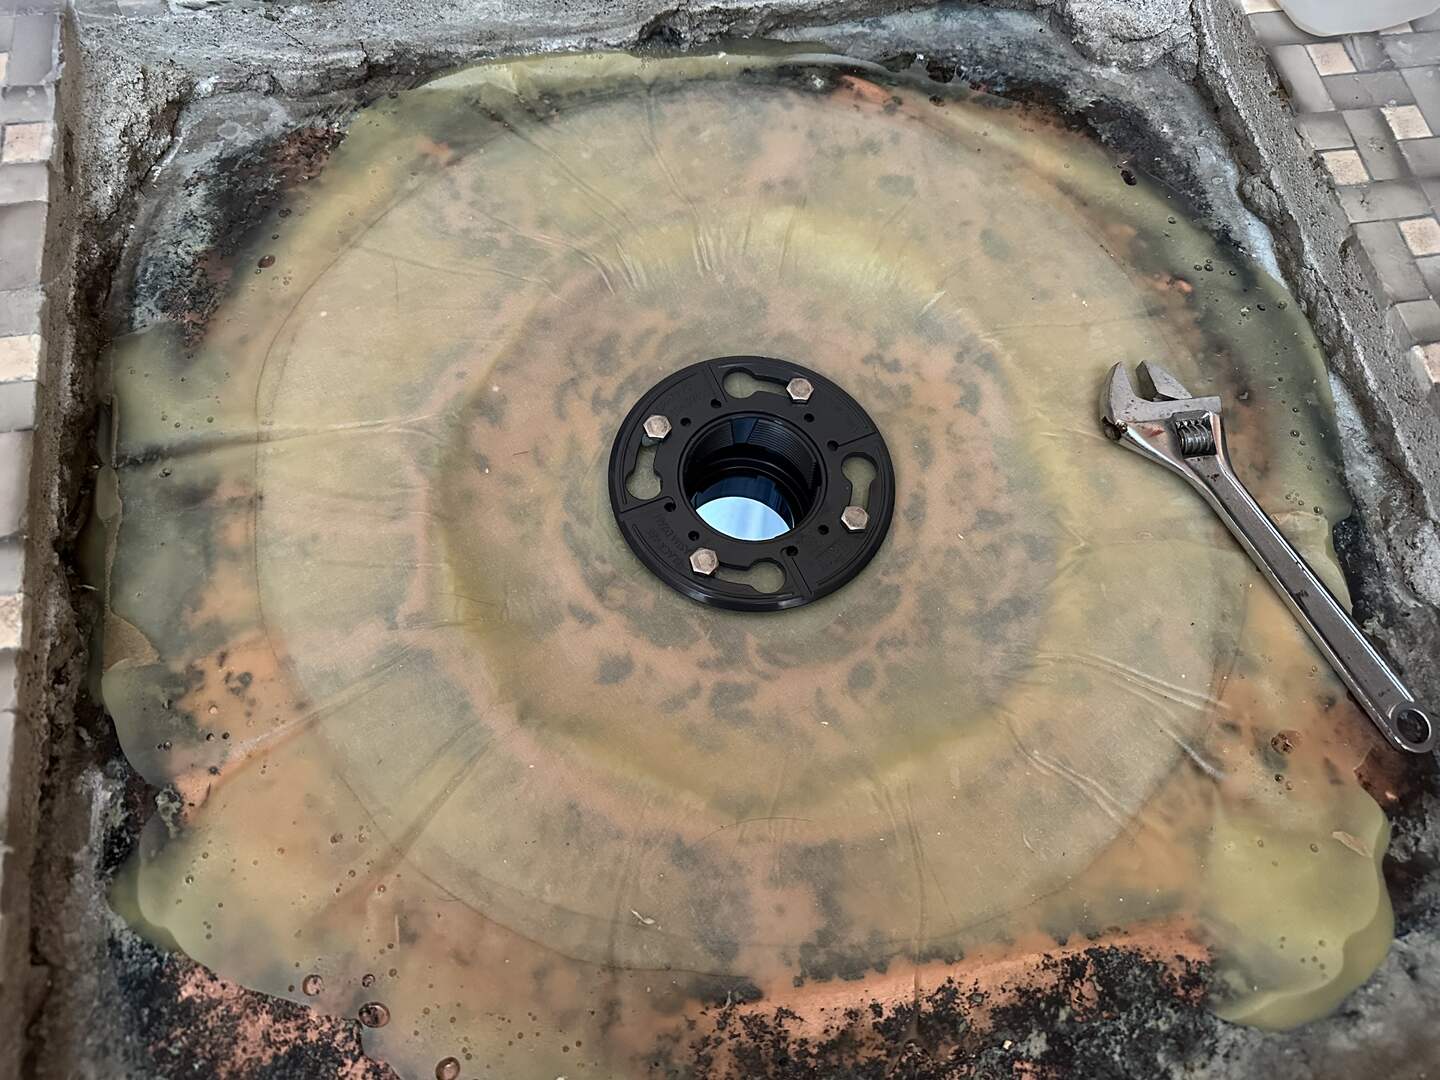
New Drain Assembly
The new drain is a standard shower pan drain that works by clamping to a shower pan with a bolted on flange.
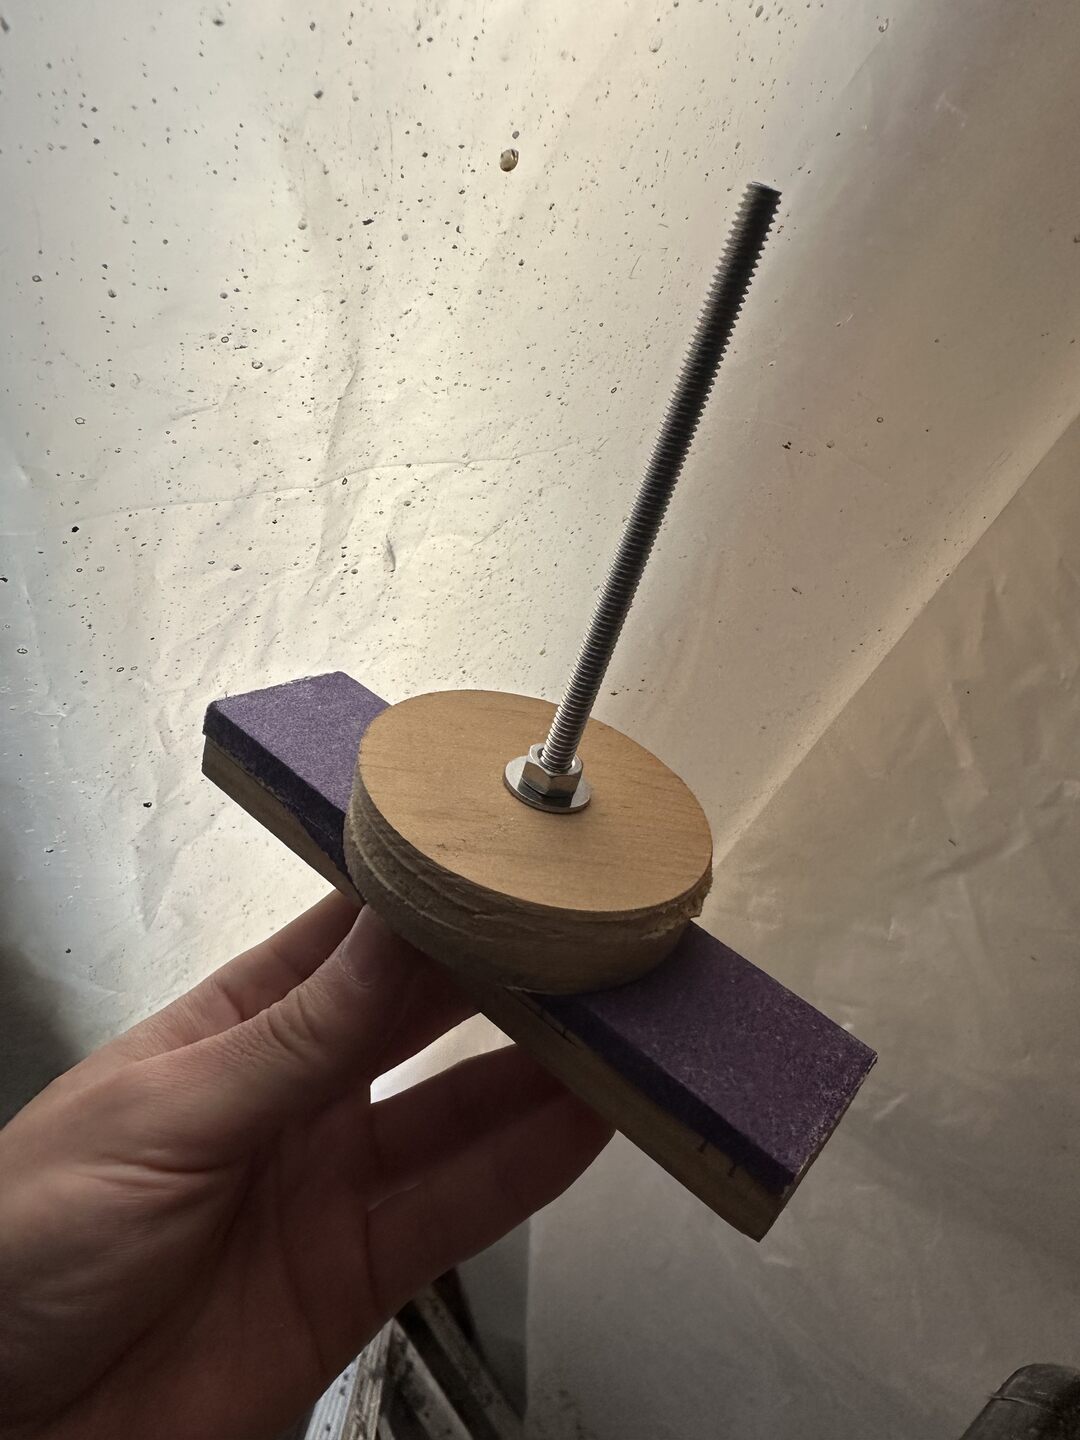
To create a smooth surface on the bottom for the sealing side of the flange, I put together a sanding tool that I chucked into a drill and spun as I pulled upward from the top.
I applied silicone to the bottom of the flange making sure to avoid clogging the weep holes. Silicone is an ideal material for this application because it is flexible.
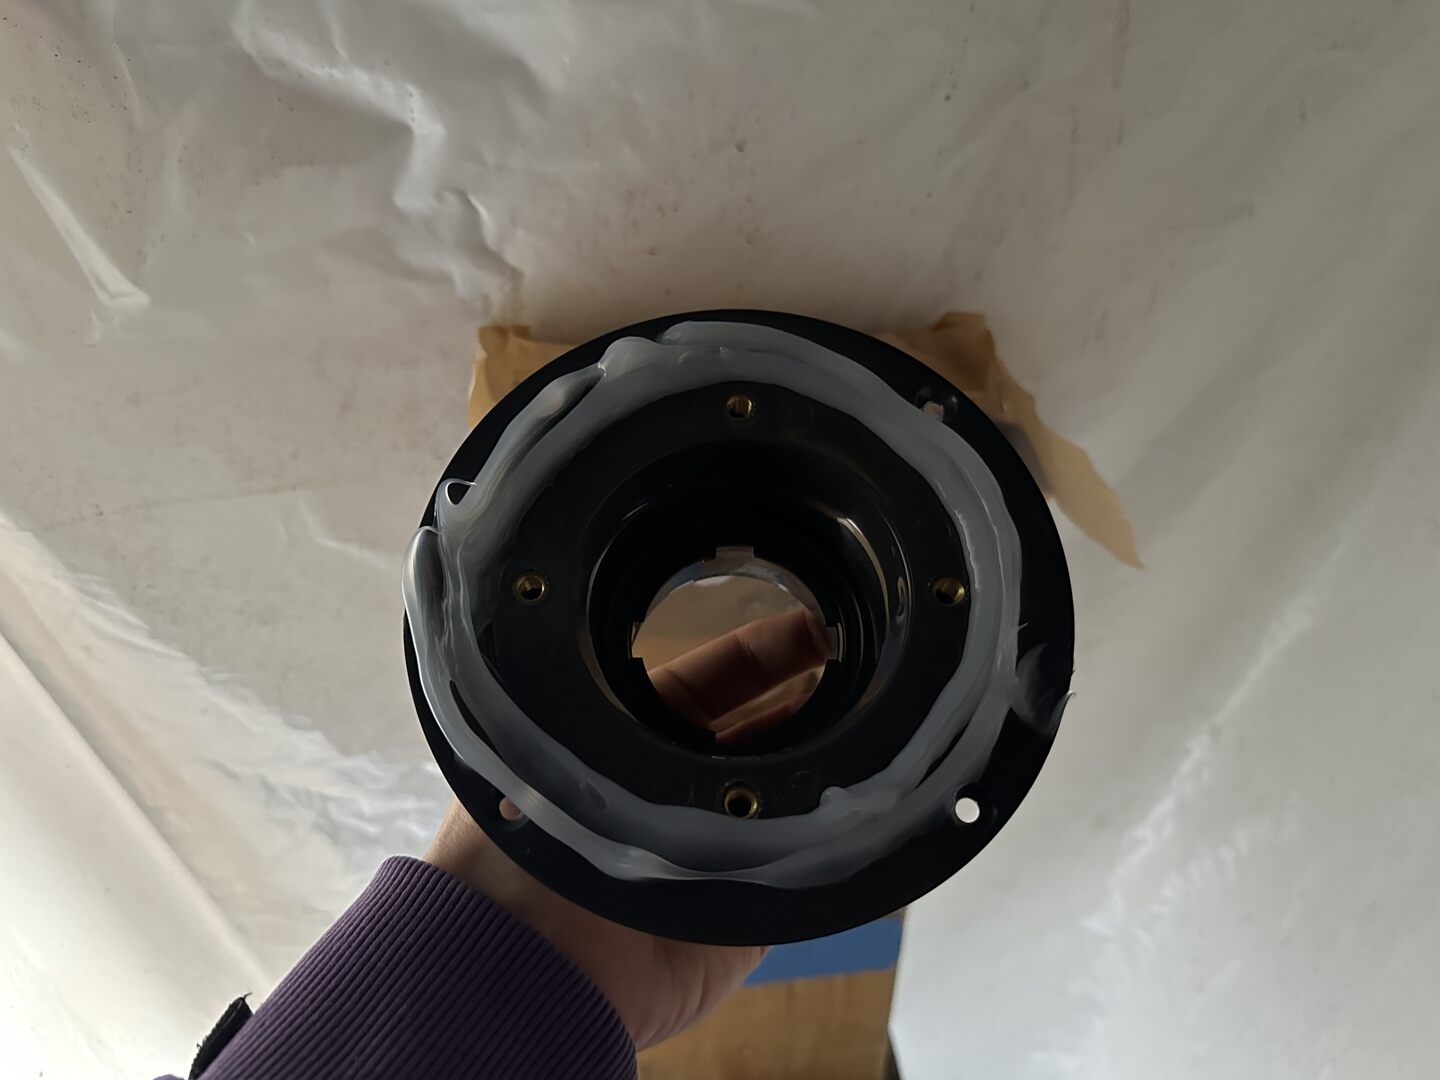
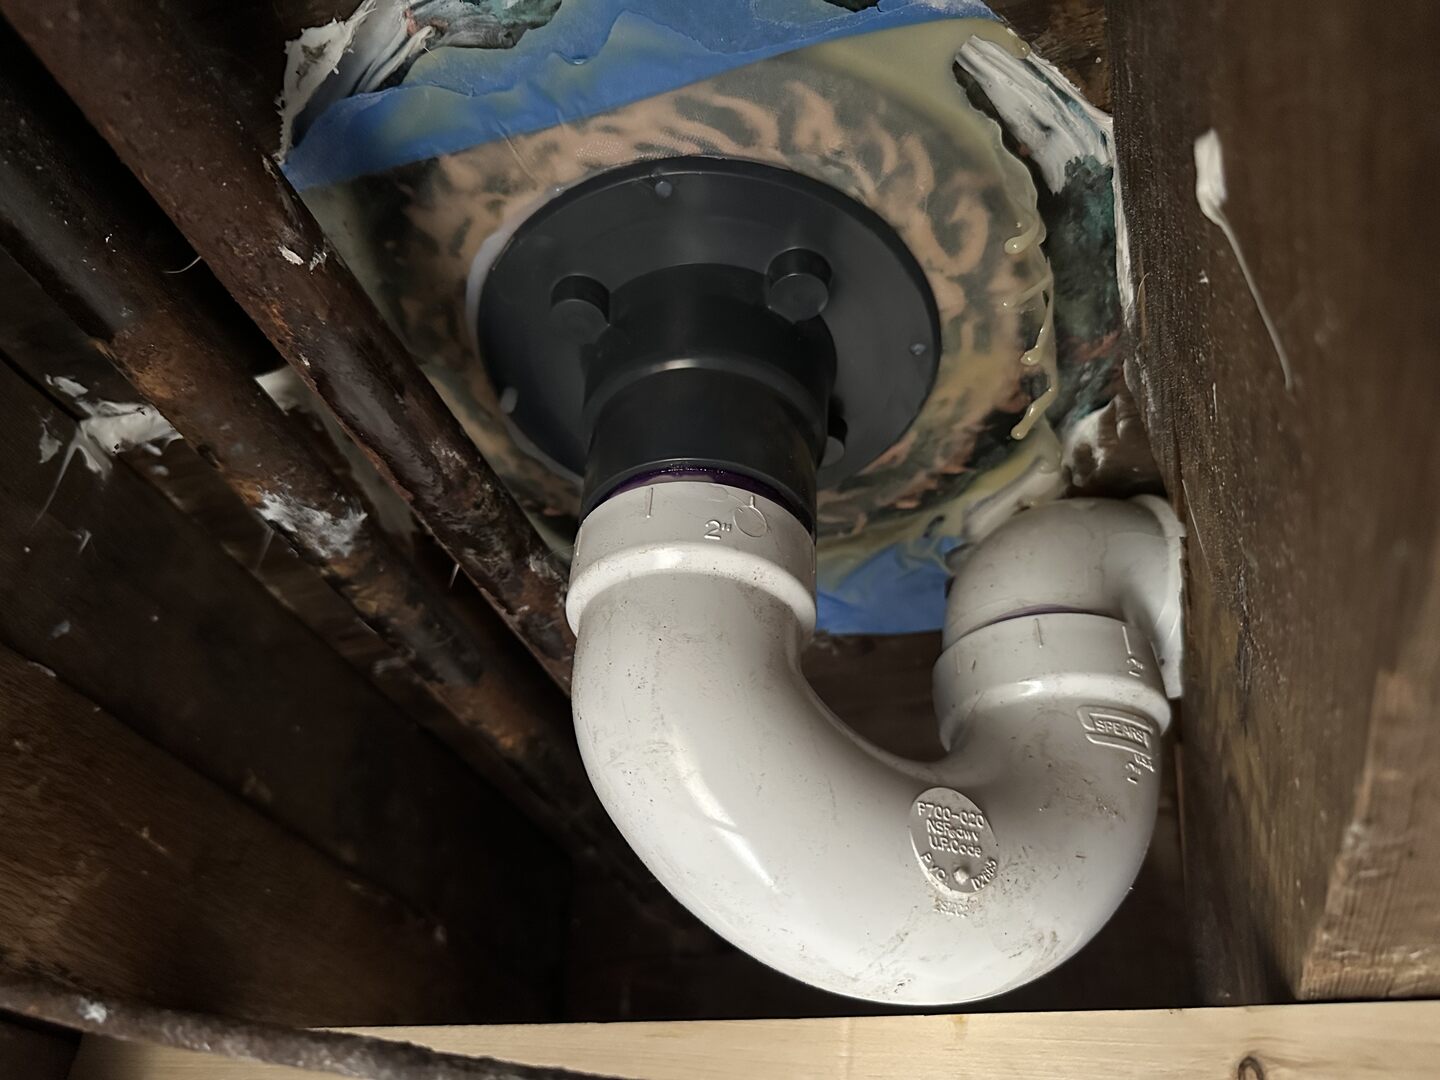
I then bolton on the top flange to clamp the drain to the patch.
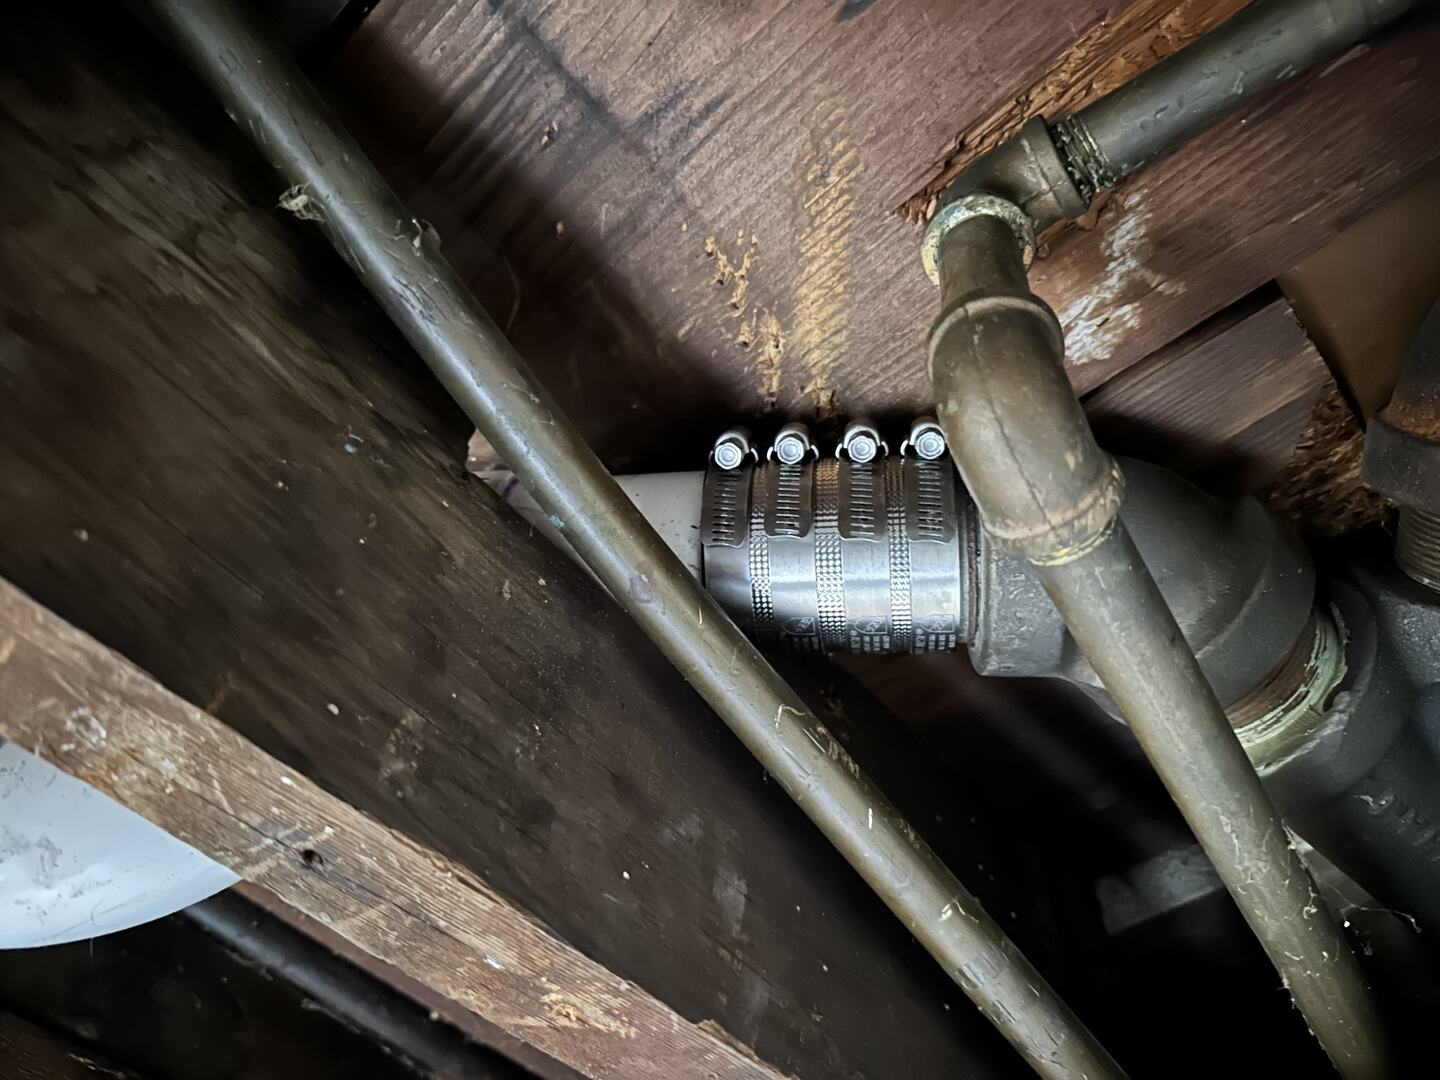
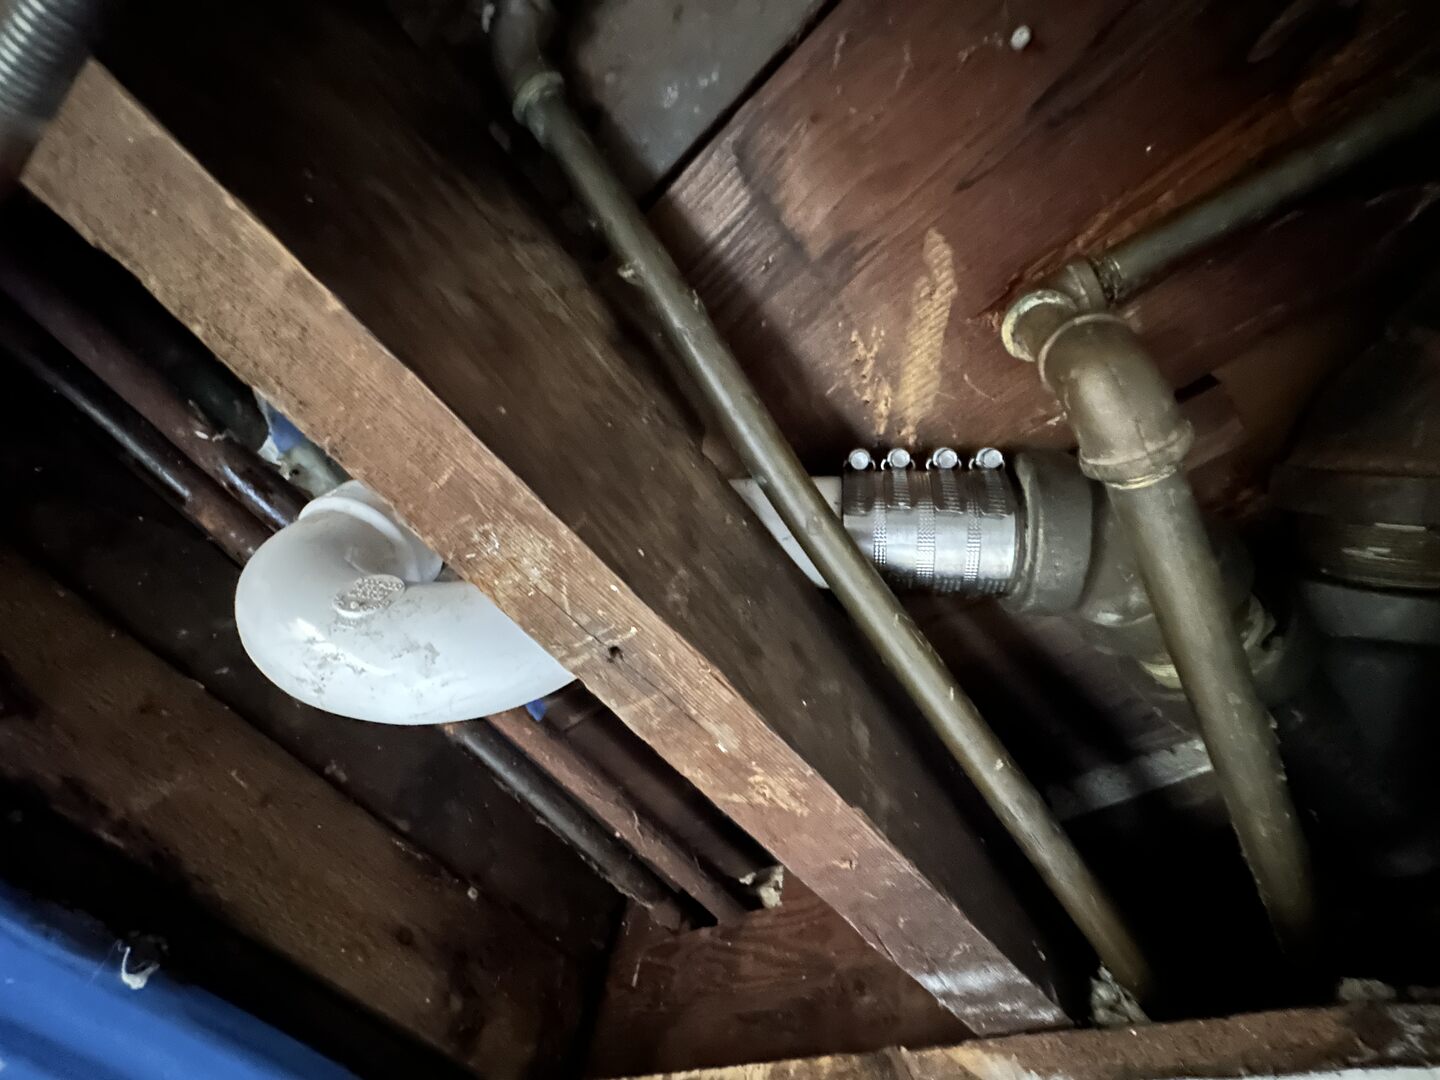
Once the new drain was sealed to the patch, I glued in a PVC P-trap and tied it to the existing steel drain line with a heavy duty rubber coupling.
Patching the Tile
Because of the temporary nature of the repair, it didn't make sense to dedicate the time needed to replace the tile. Instead, I simply patched the shower surface with a 50:50 blend of topping mix and sand. I chose this blend to minimize shrinkage and create a surface that I could shape into a slope towards the drain. Using a high sand content reduces shrinkage because sand does not shrink, cement does, so a higher sand to cement ratio reduces shrink.
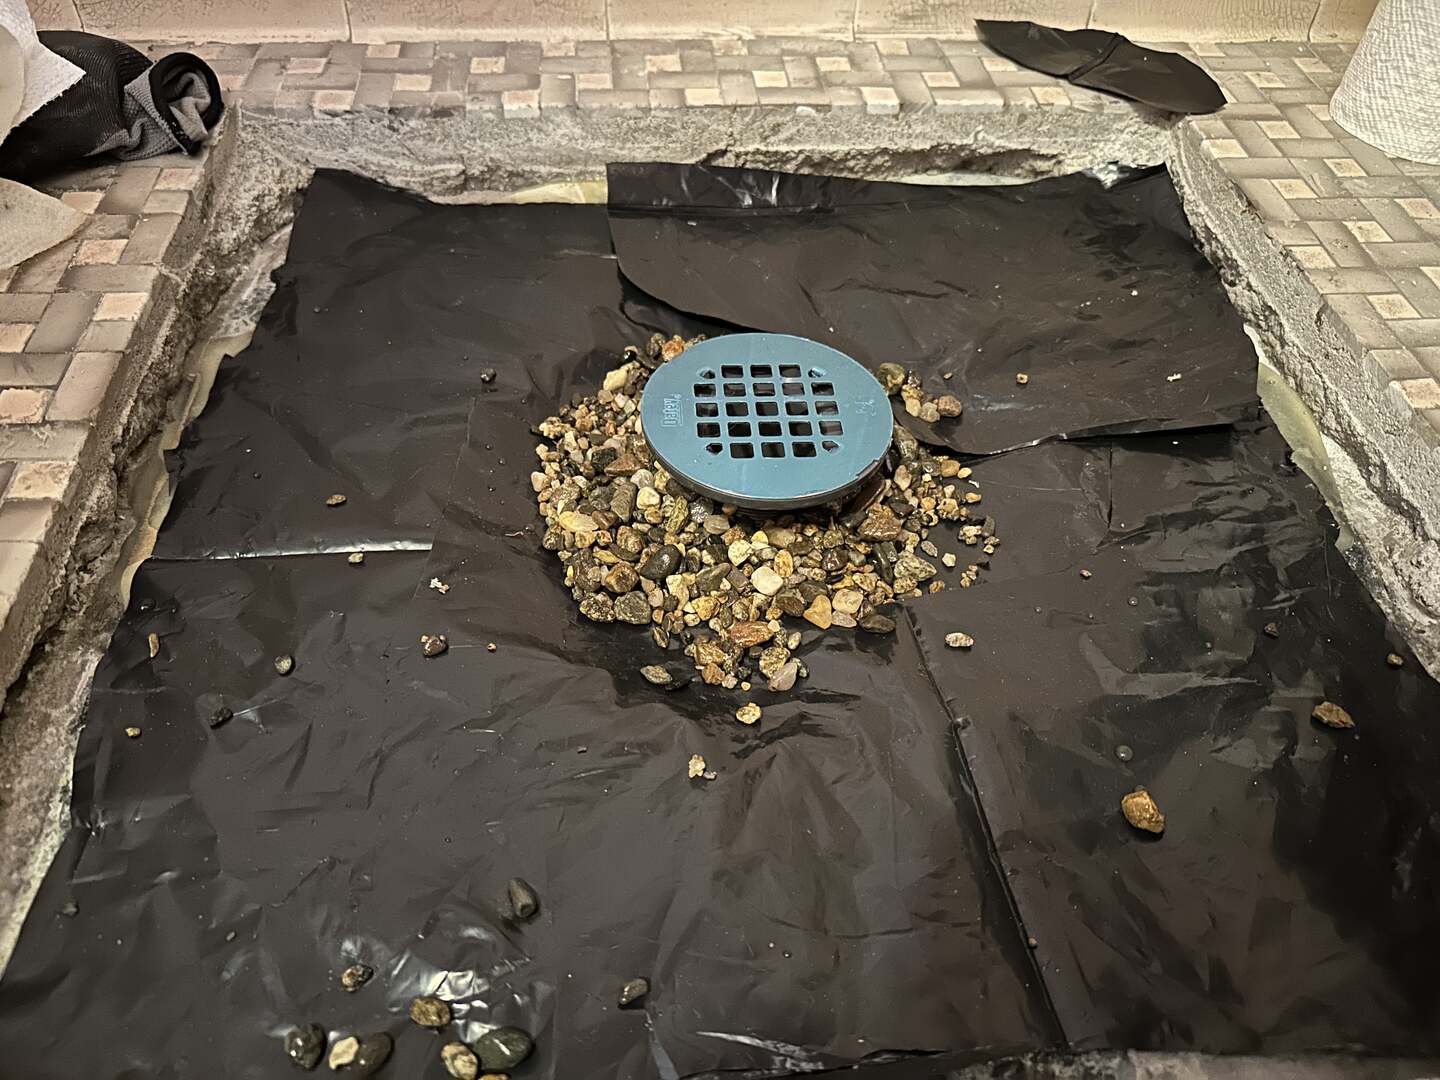
First I threaded in the adjustable drain screen so it was about 1/4" below the top of the tile.
First I placed a polyethylene isolation layer between the pan/patch and the masonry fill so that they can freely slip past each other without transferring stress in case of any movement. Then I added some pea gravel around the weep holes in the drain so that don't get clogged. The weep holes are critical for allowing water at the surface of the pan to drain away.
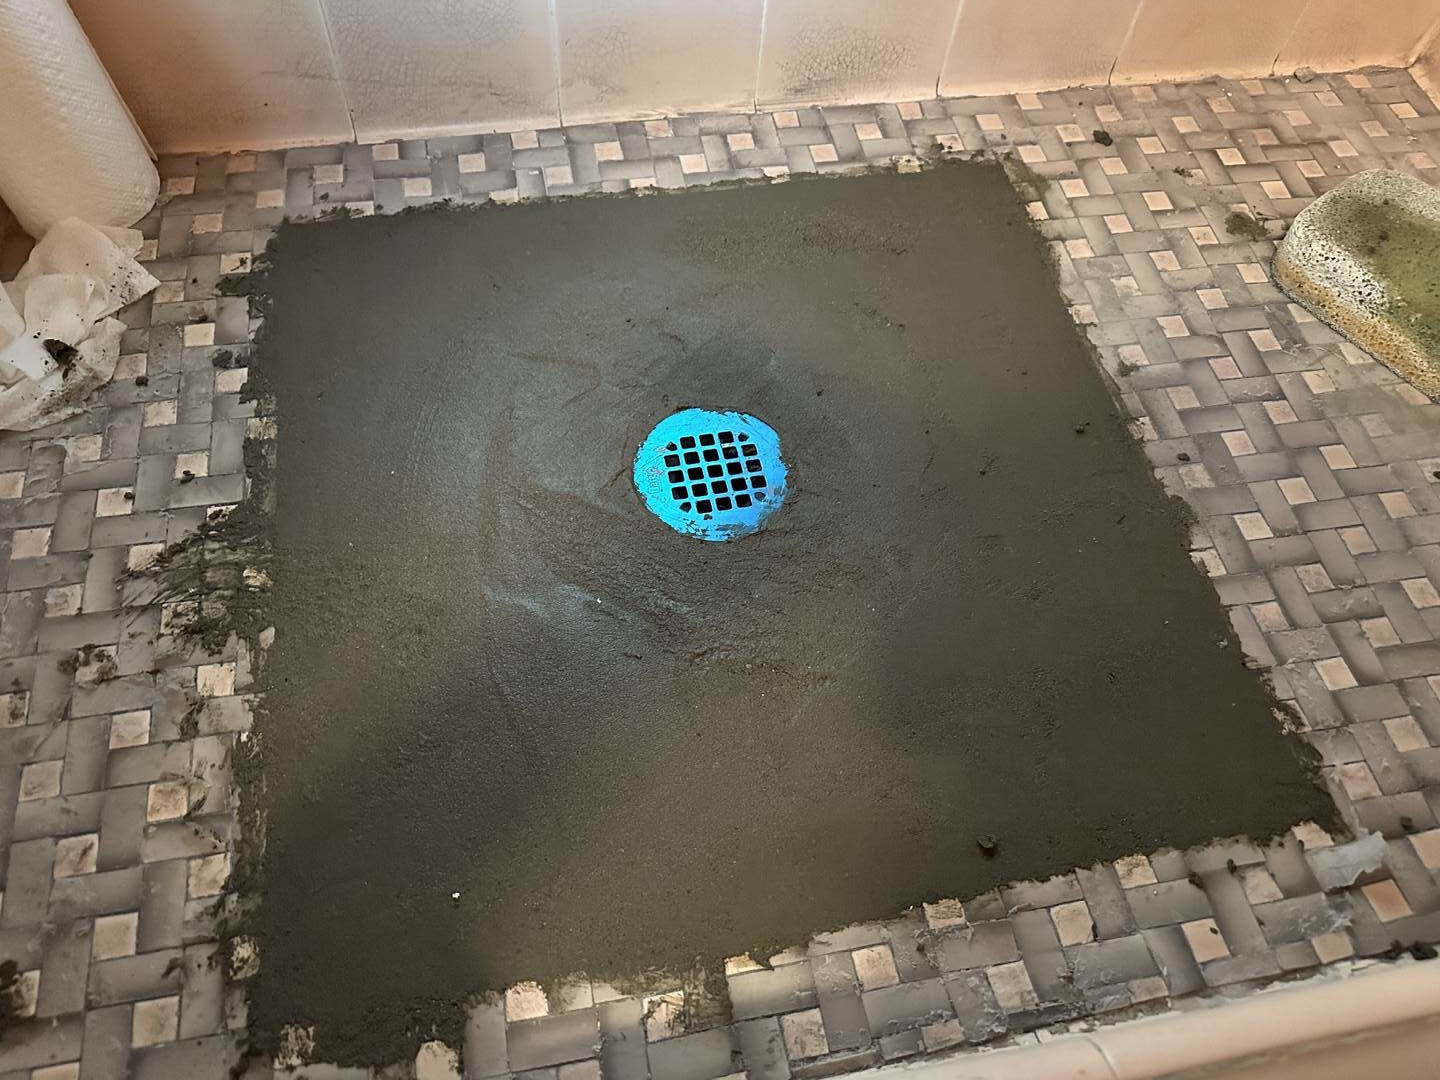
Finally, I placed the masonry mix so it sloped towards the drain and sponge floated it to provide a non-slip surface.
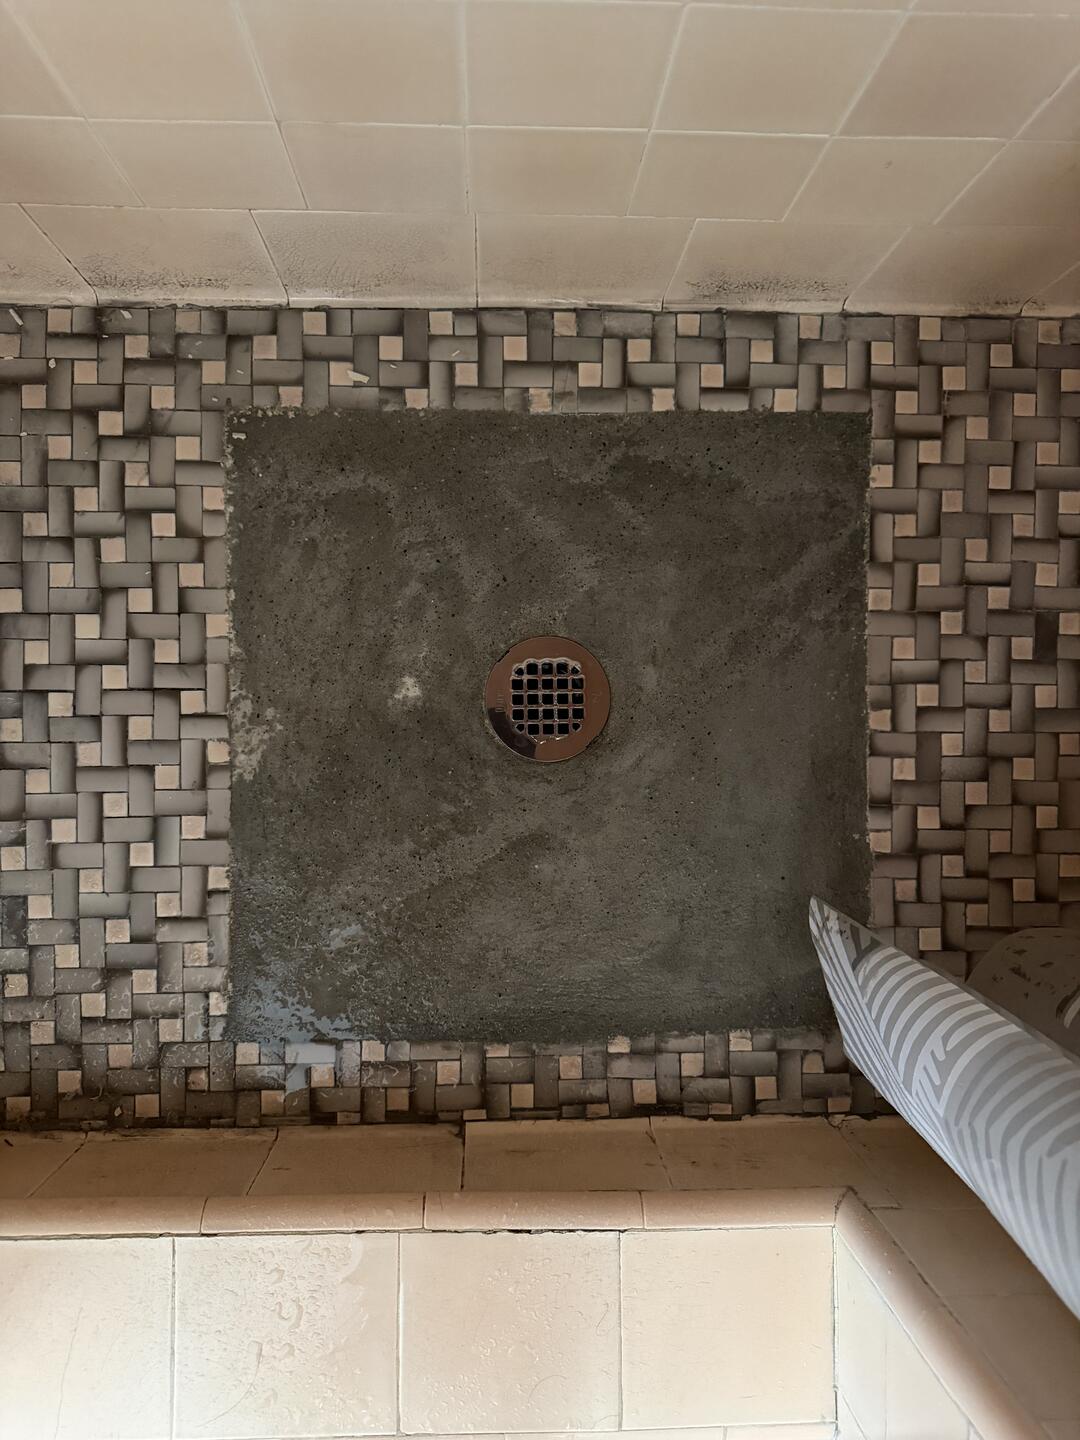
After 24 hours, the shower was ready to use.
Ceiling Repair
To repair the ceiling I installed new 3/4" pine furring strips, placed some drywall, and painted it in pure white. Ceiling are typically painted in pure white. I also installed a small inspection door to monitor the repair. This entire section of ceiling would be concealed behind a full height book case.
Conclusion
The repair was successful and the shower was put back into service about 72 hours after the failure occurred. A complete demolition and re-build of the bathroom was planned and the repaired shower was only used for about a month.
I decided to write this piece because there wasn't much information available about old drain assemblies, and repairing a copper pan is typically considered impractical or not possible. I wanted to document and demonstrate the repair method that I devised so that others can use it and possibly avoid or delay a costly full shower rebuild. While my method required a lot of labor, it was relatively inexpensive and it performed very well. I can't be sure, but I believe it could be viable as a medium or even long term fix. However, I would only recommend it as a short term repair.
© 2024 Erik Nakamura. All rights reserved.
Use of this content is subject to the terms described in the license section of the about page.